


Windows 11 often replaces your drivers with its own. One auto update can break your graphics, printer, or sound. This guide shows you how to stop that in under 5 minutes.
Hi everyone. If Windows keeps changing your drivers without asking, you are in the right place. By default Windows 11 installs drivers on its own. You can stop it and keep full control.
Why Turn Off Auto Driver Updates
- Stop crashes: New drivers from Windows Update can cause blue screen or black screen issues.
- Keep what works: If your printer, graphics, or audio works fine now, you may not want Windows to change it.
- Stay in control: You decide when to update, not Windows.
Which Method Should You Use
| Method | Best For | Works on Home? | Blocks Updates? |
|---|---|---|---|
| 1. Device Settings | Stop new hardware auto install | Yes | Partly |
| 2. Group Policy | Stop drivers from Windows Update | No, Pro only | Yes |
| 3. Registry Fix | Same as Group Policy for Home | Yes | Yes |
| 4. Search Config | Extra lock | Yes | Partly |
Use Method 1 plus Method 2 if you have Pro. Use Method 1 plus Method 3 if you have Home. This pair works even after big Windows updates.
Method 1: Turn Off Auto Install in Settings
This stops Windows from adding drivers when you plug in new devices.
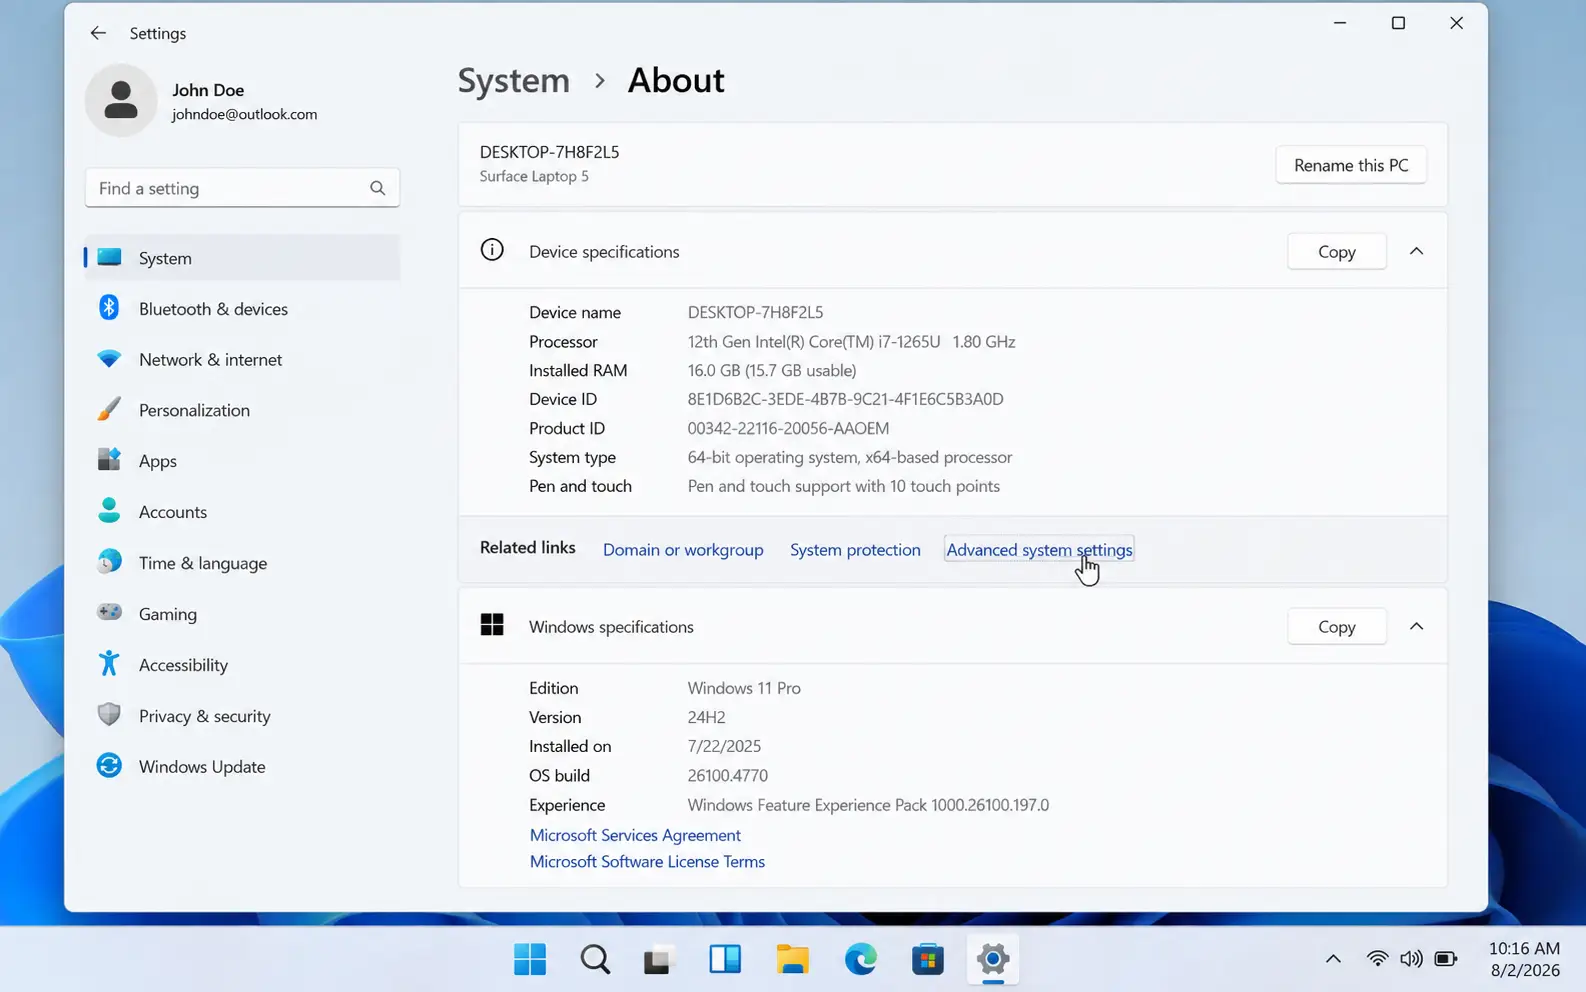


- Press Win + I to open Settings. Go to System then About.
- Click Advanced system settings.
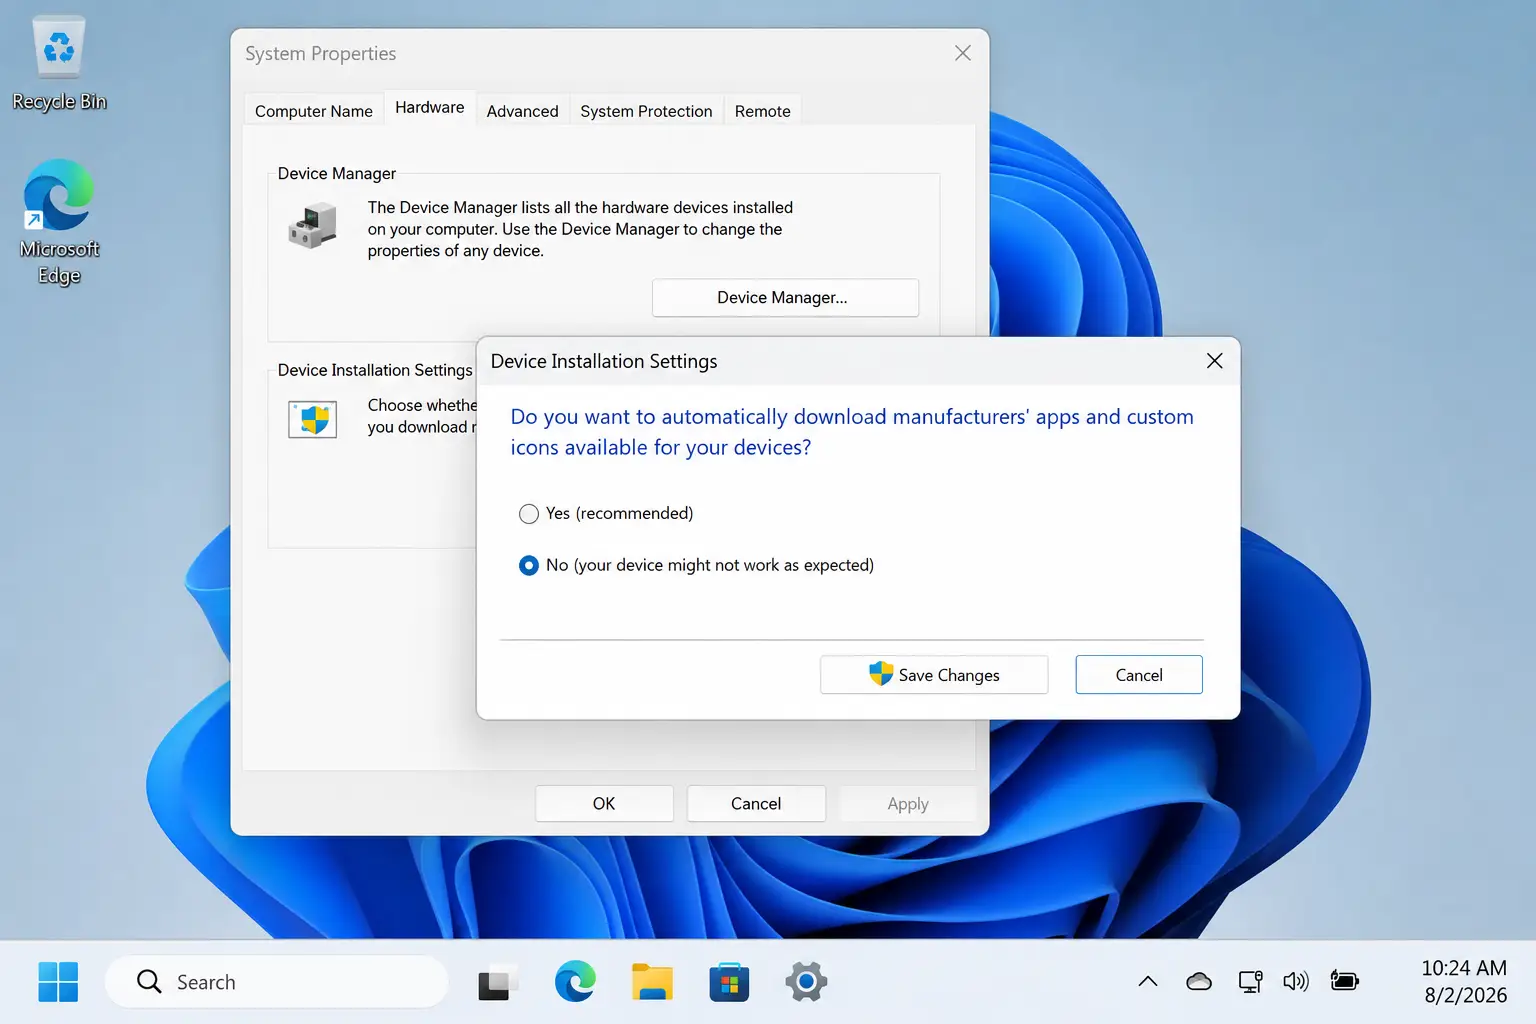
- Open the Hardware tab. Click Device Installation Settings.
- Select No and click Save Changes. Restart your PC.
Method 2: Block Drivers with Group Policy (Pro Only)
This is the most reliable way if you have Windows 11 Pro.
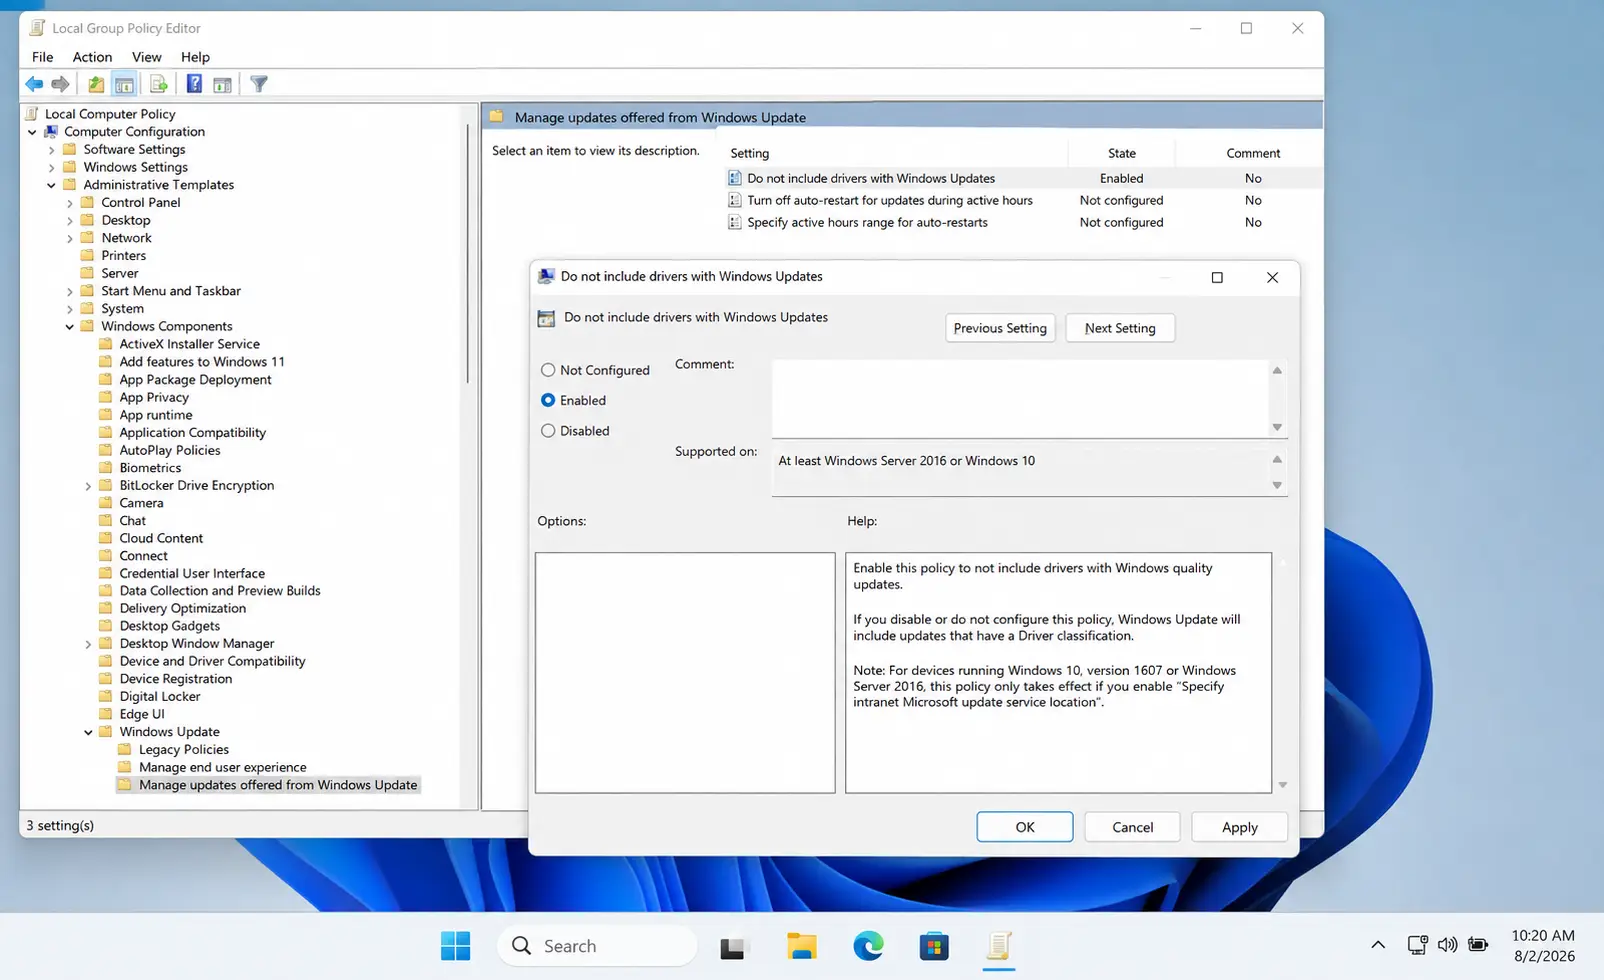

- Press Win + R. Type gpedit.msc and press Enter.
- Go to Computer Configuration then Administrative Templates then Windows Components then Windows Update then Manage updates offered from Windows Update.
- Double click Do not include drivers with Windows Updates. Set it to Enabled. Click Apply and OK. Restart.
Method 3: Registry Fix for Home Users
If you have Home edition, this does the same job as Group Policy.
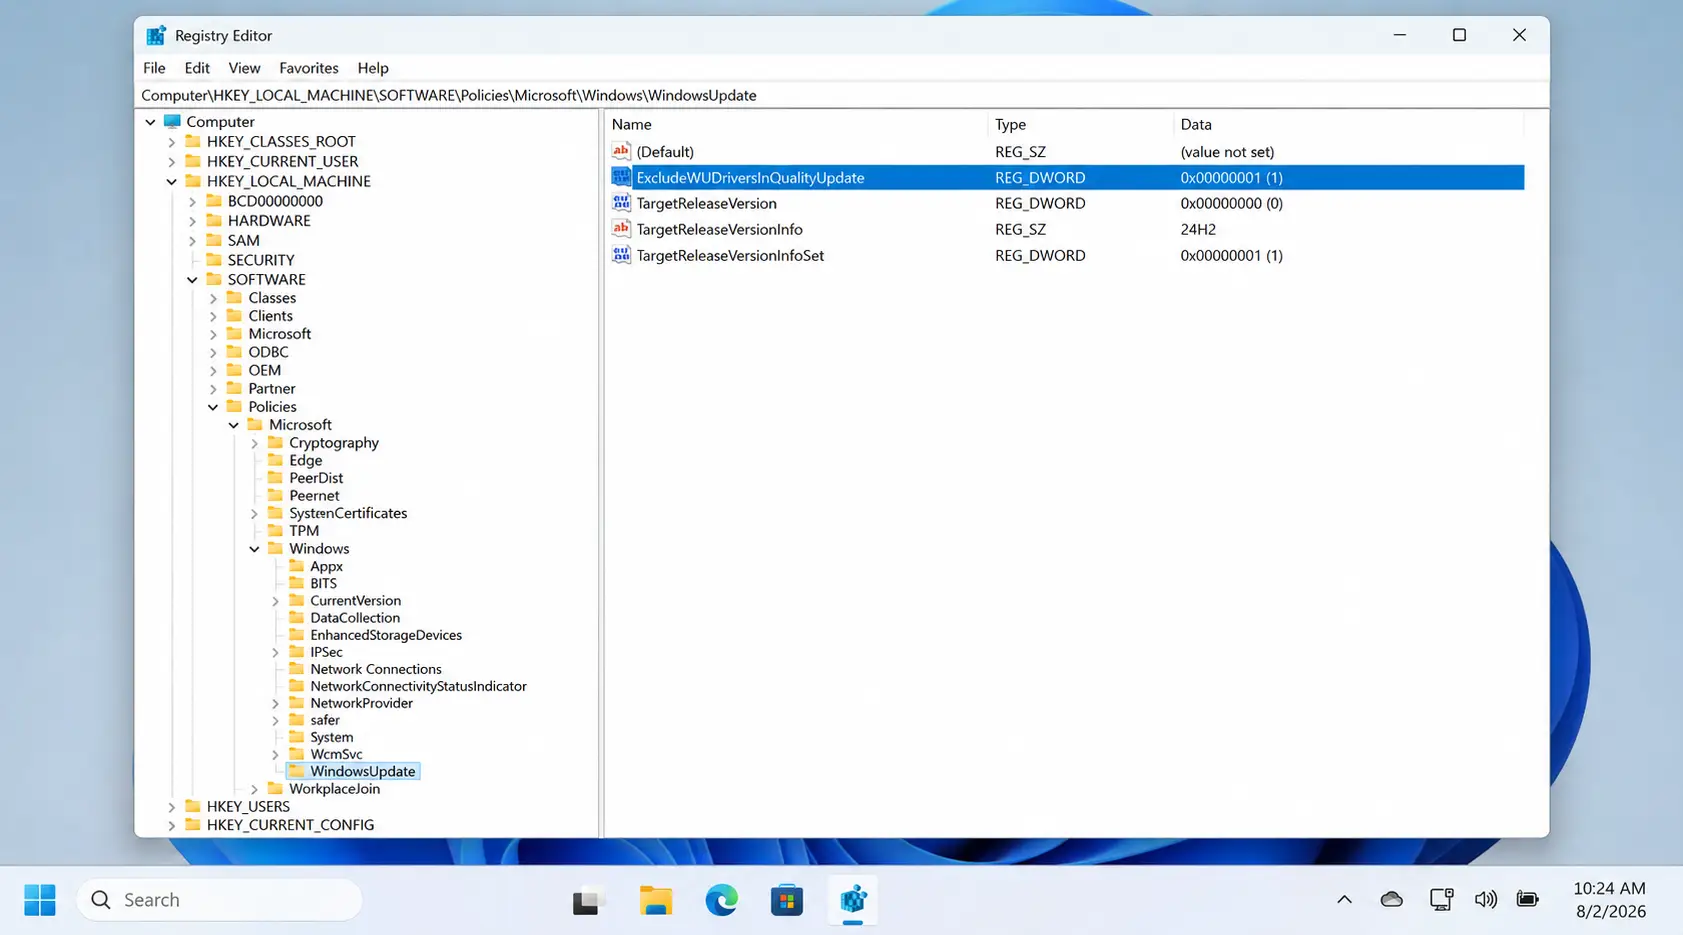

Run this in Command Prompt as admin. Restart after.
Method 4: Extra Lock
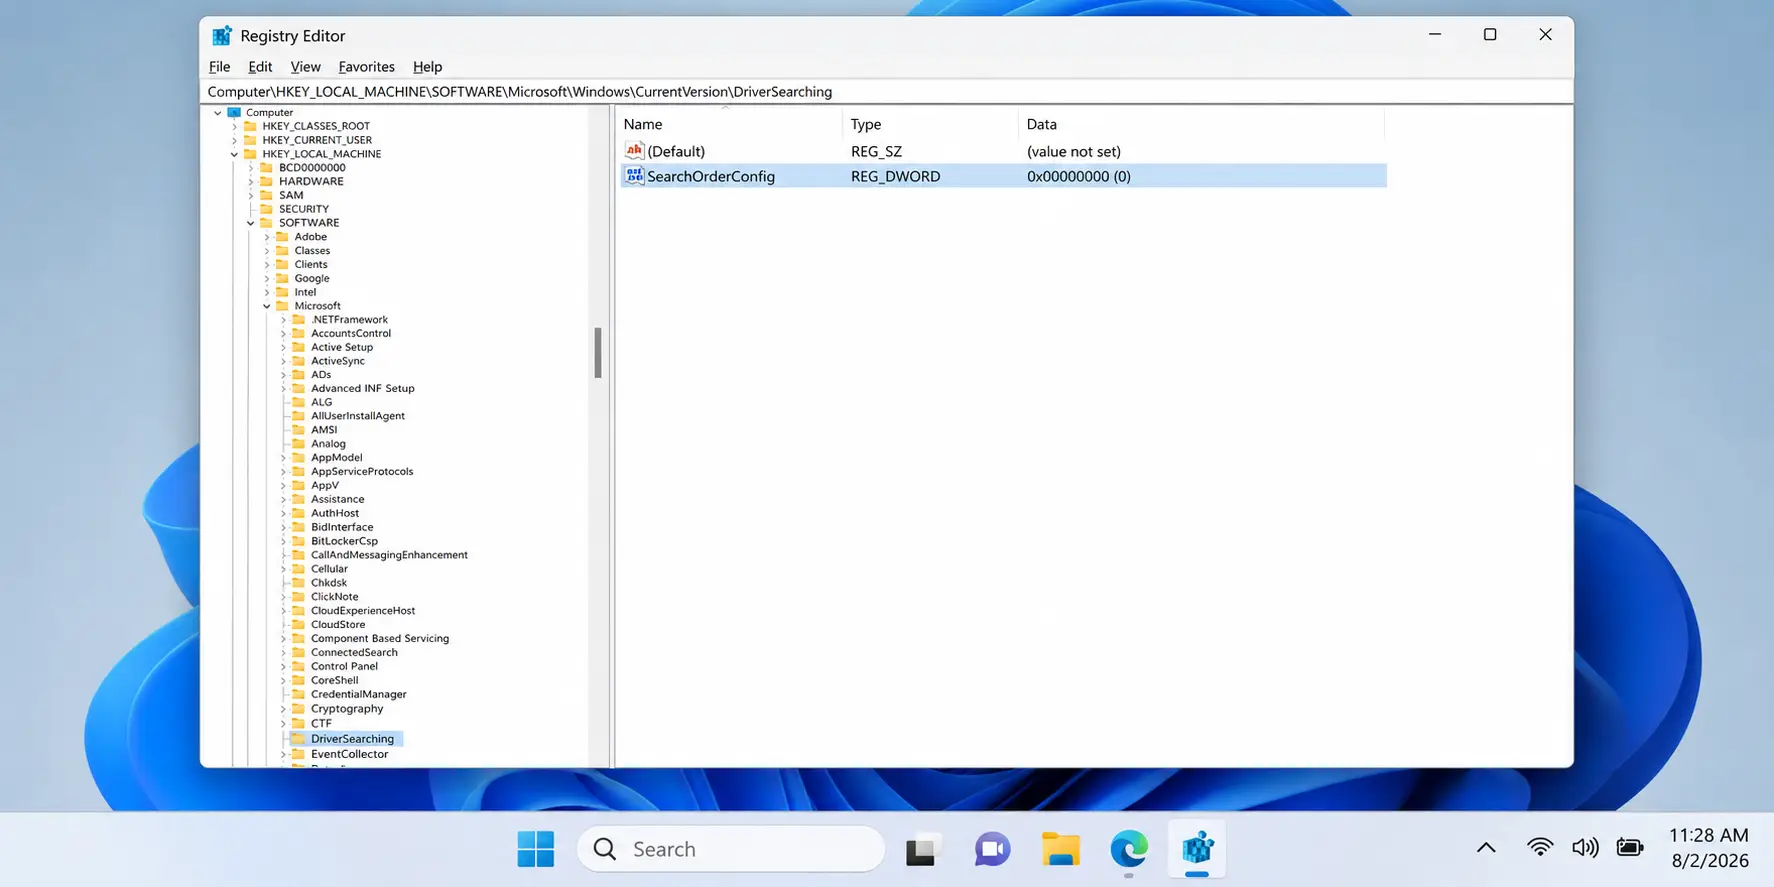

After You Block Updates
You will need to update drivers yourself sometimes. Here is how:
| What | Where to Get It | How Often |
|---|---|---|
| Graphics | NVIDIA or AMD site | Monthly |
| Printer | Printer brand site | When needed |
| Other drivers | Windows Update then Advanced then Optional updates | Pick by hand |
Fix a Bad Driver That Already Installed
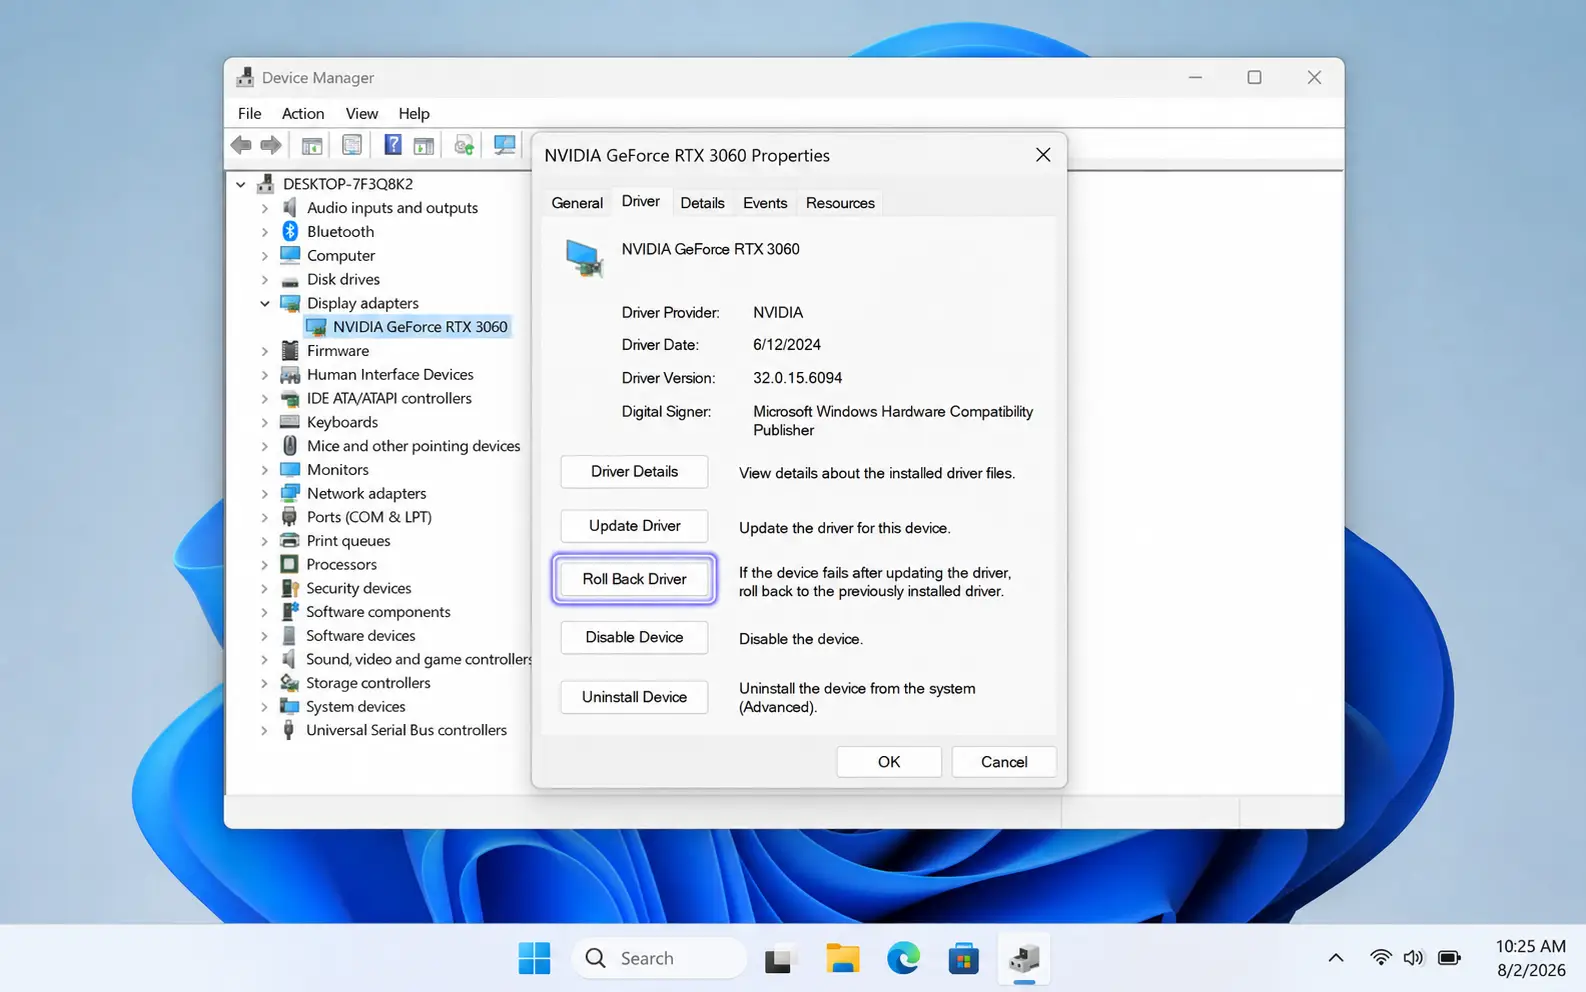
Open Device Manager. Right click the device. Click Properties. Open the Driver tab. Click Roll Back Driver.
Video Guide
If you like to watch instead of read:

1. Use Method 1 plus Method 2 or 3 together. 2. Turn off auto update in MyASUS, Lenovo Vantage, or Dell SupportAssist. 3. After a big Windows update, check the setting again.
Next read: How to customize Windows 11 taskbar, Disable Automatic Windows Updates and How to disable Windows error reporting