Windows Tutorial
Microsoft Teams hides its best features behind small icons and buried menus. The biggest time-savers most people never find: live Loop tables that end version chaos, messages that send themselves at the right hour, and an AI assistant that reads your documents for you. This guide covers those and many more across messaging, interface customization, and meetings, with exact steps and a screenshot for each one.
What You Need to Know
- Everything here uses the standard Teams desktop app on Windows 10/11 with a work or school account. No admin rights, no add-ons.
- The guide is split into three color-coded parts: messaging and collaboration (purple), interface customization (teal), and calendar and meetings (amber).
- A keyboard shortcut quick reference table is at the bottom of the page for fast scanning.
Part 1: Advanced Messaging and Team Collaboration
Fix the most common Teams complaint: important messages getting lost in the noise.
1
Save Messages for Later
Important messages disappear fast in busy channels. The Saved view works like a bookmarks folder: flag a message once and Teams keeps it in a private list only you can see. Use it for action items, links, and decisions you will need again.
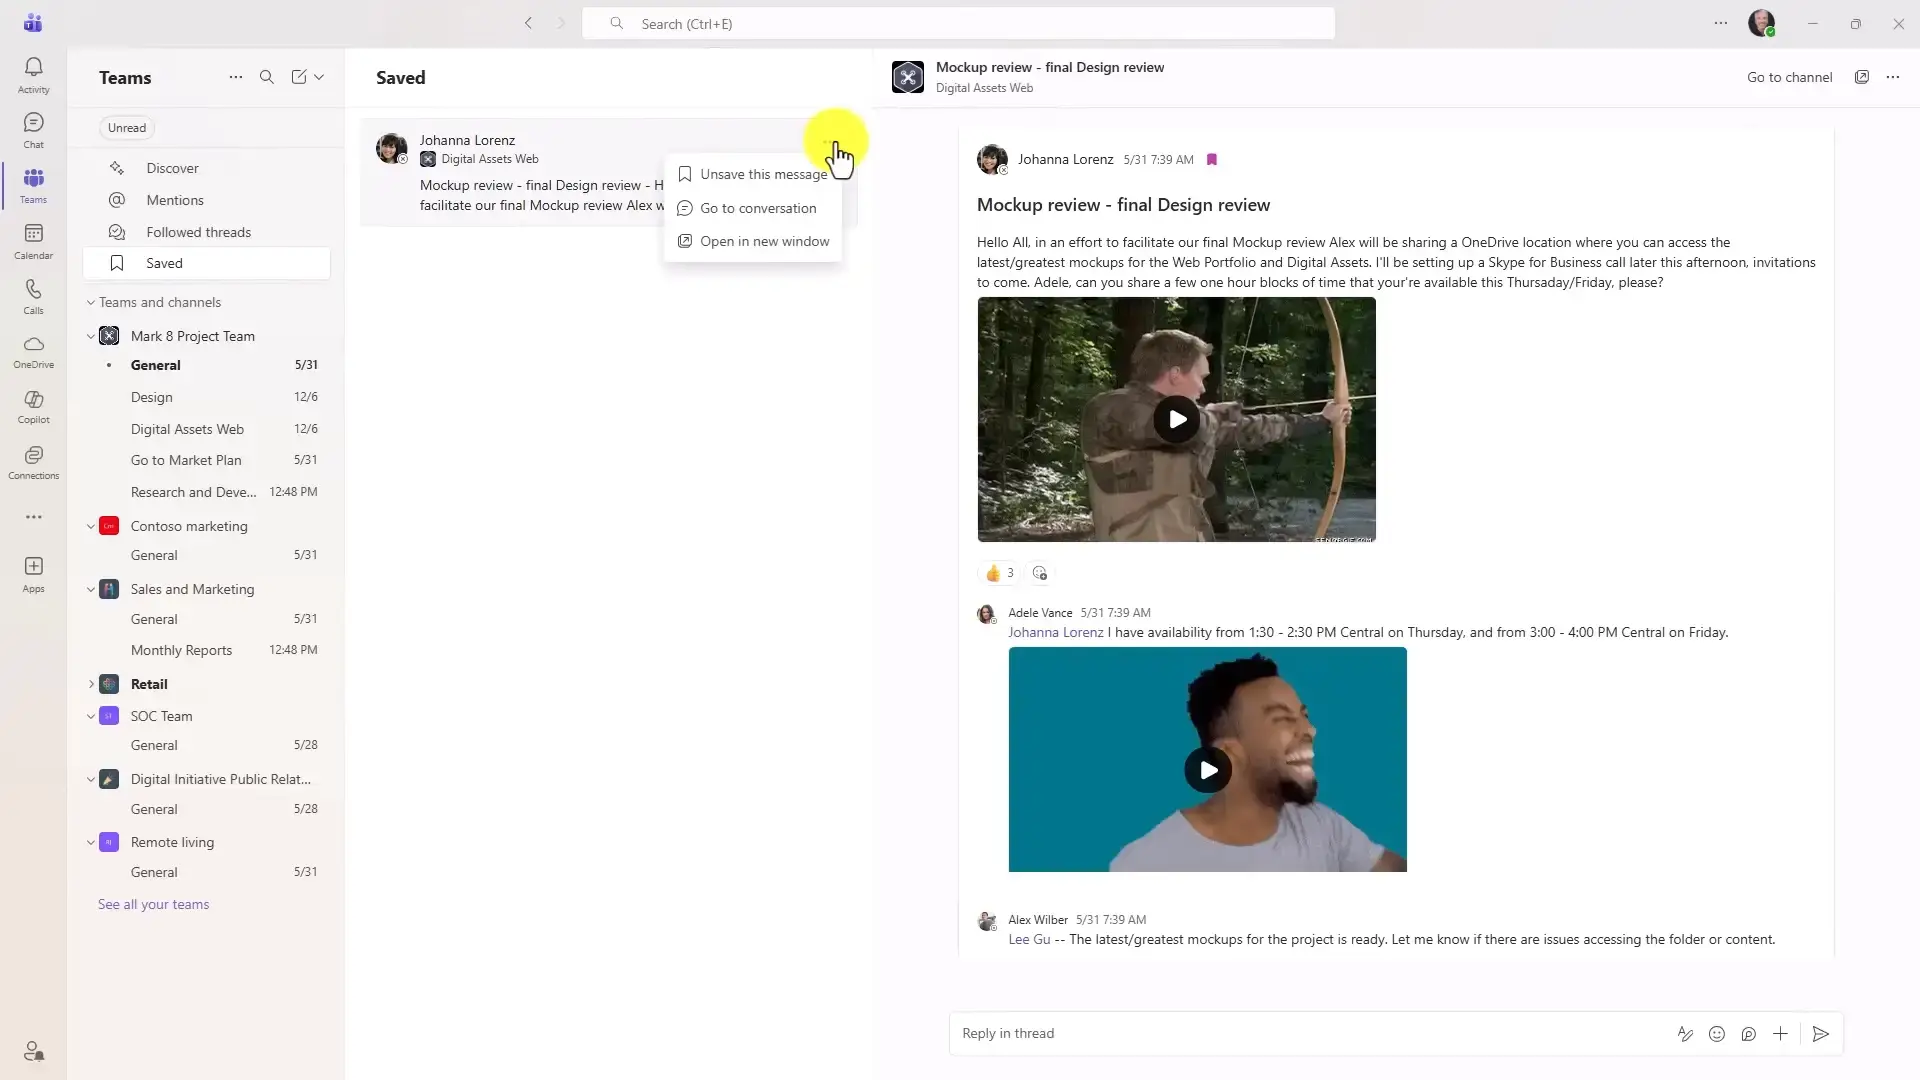
- Step 1. Hover over any message in a chat or channel.
- Step 2. Click the three-dot menu (More options) that appears.
- Step 3. Select Save this message.
- Step 4. To read your bookmarks later, click the Saved icon in the left navigation pane.
2
Schedule a Message to Send Later
Writing a message at 11 pm does not mean your team needs to see it at 11 pm. Scheduled send lets you write now and deliver during work hours, so you stop training people to expect replies at midnight. The trick is that channels and private chats use different buttons.
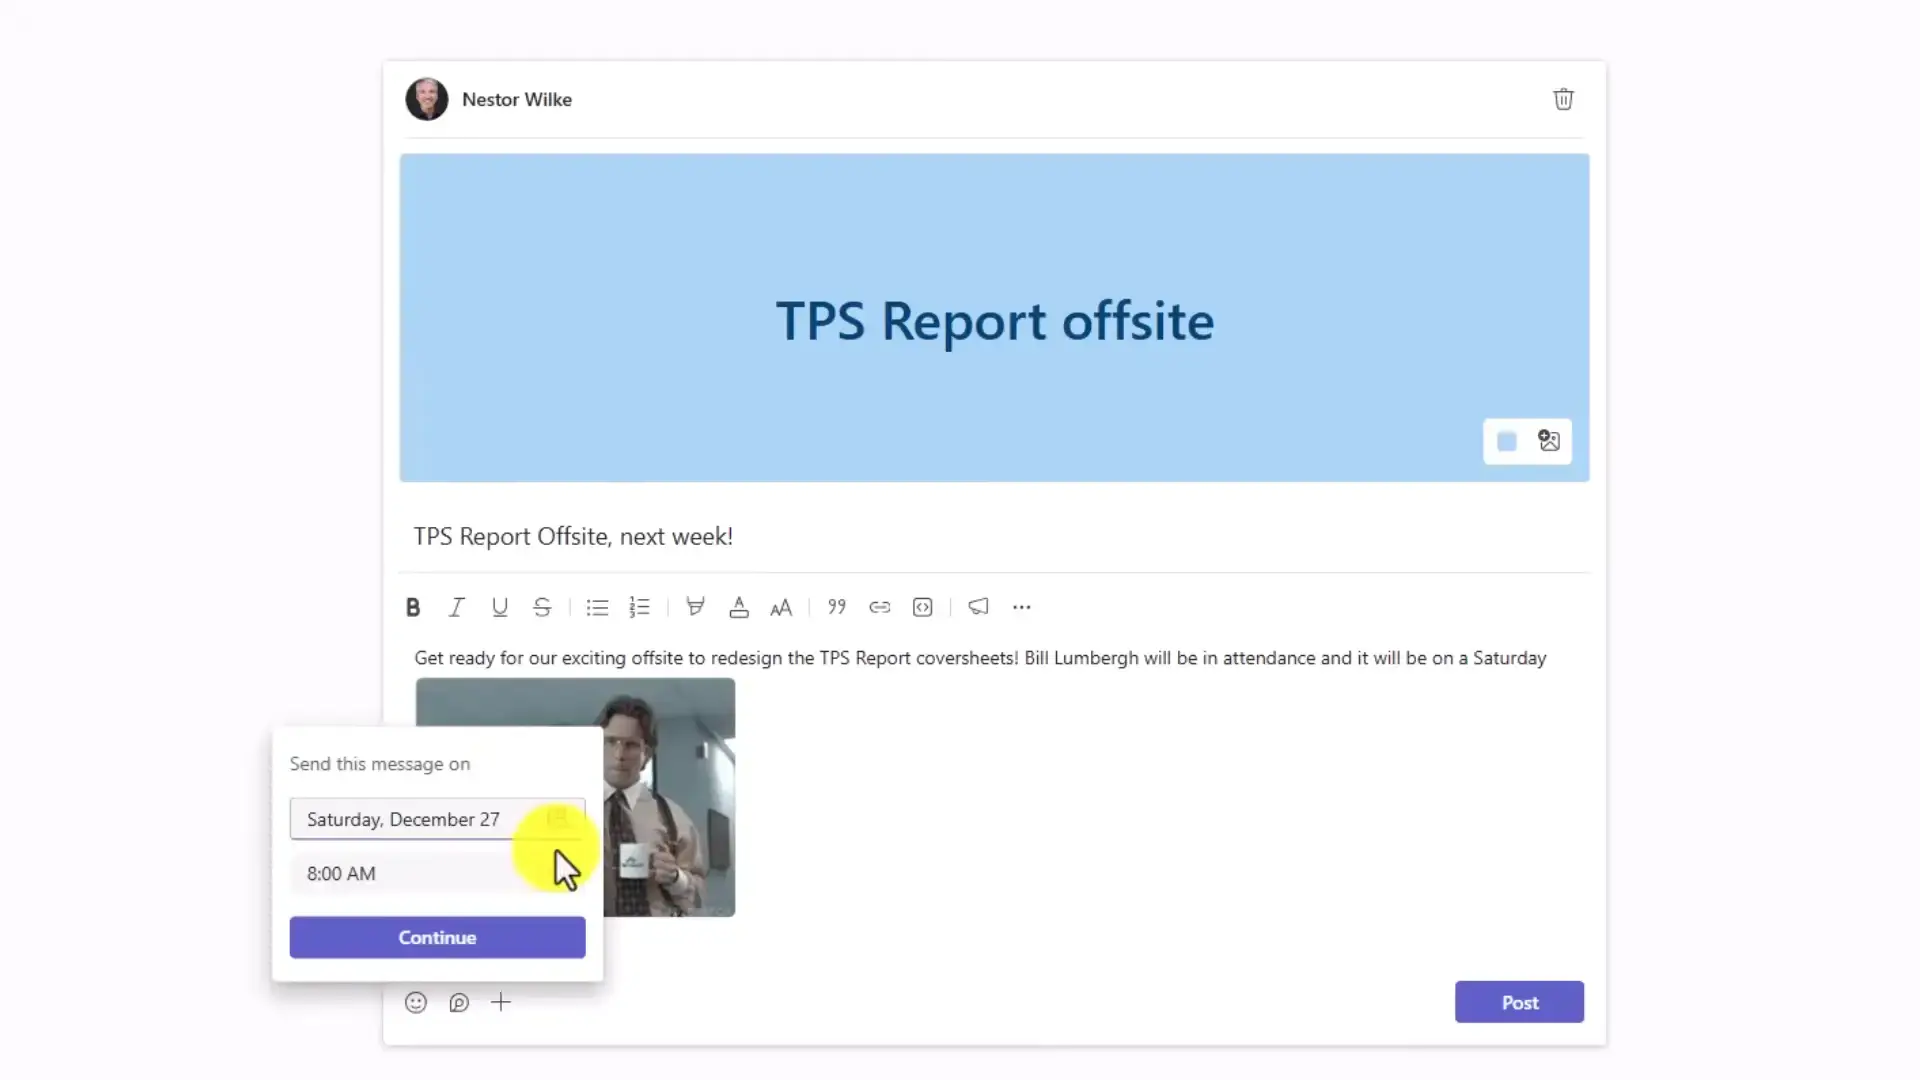
- Step 1. In a channel: click the plus icon in the message box and select Schedule message.
- Step 2. In a private chat: right-click the send button (the paper airplane icon) instead.
- Step 3. Pick your delivery date and time from the popup calendar.
- Step 4. Click Send scheduled message. You can still edit or cancel it before it goes out.
3
Loop Components: Live Content Inside Messages
Top Pick
A Loop component is a live piece of content that sits inside a message: a table, checklist, or voting table. Everyone edits the same copy in real time, and it stays updated everywhere it is shared. That kills the classic problem of five people replying with five conflicting versions of the same list. If you only adopt one tip from this guide, make it this one.
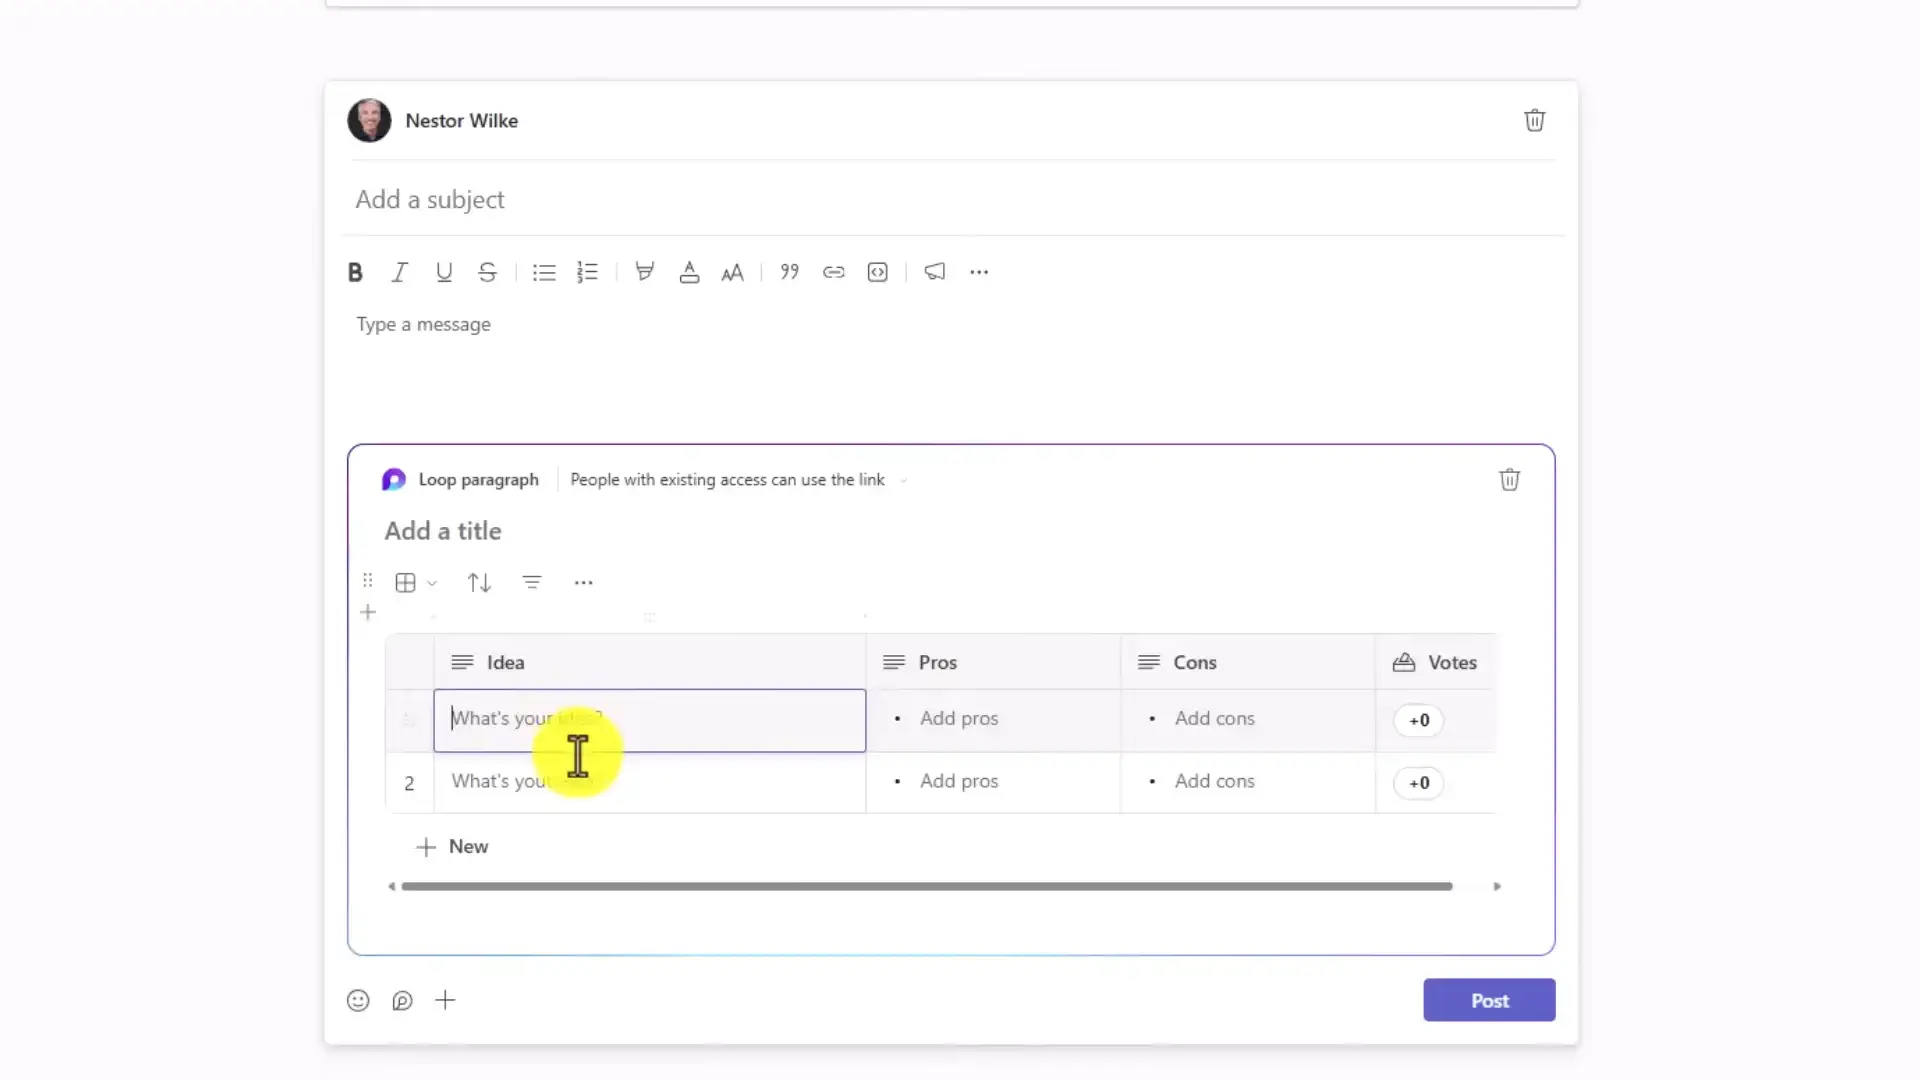
- Step 1. In any chat, click the Loop icon in the messaging toolbar.
- Step 2. Choose a component type, for example a voting table, task list, or checklist.
- Step 3. Fill in your starting content and send the message.
- Step 4. Watch teammates edit it live. Their avatars appear on the component as they type.
4
Post One Announcement in Multiple Channels
When an announcement needs to reach three teams, most people copy and paste it three times. Teams can cross-post to several channels at once, and replies stay linked to each channel separately.
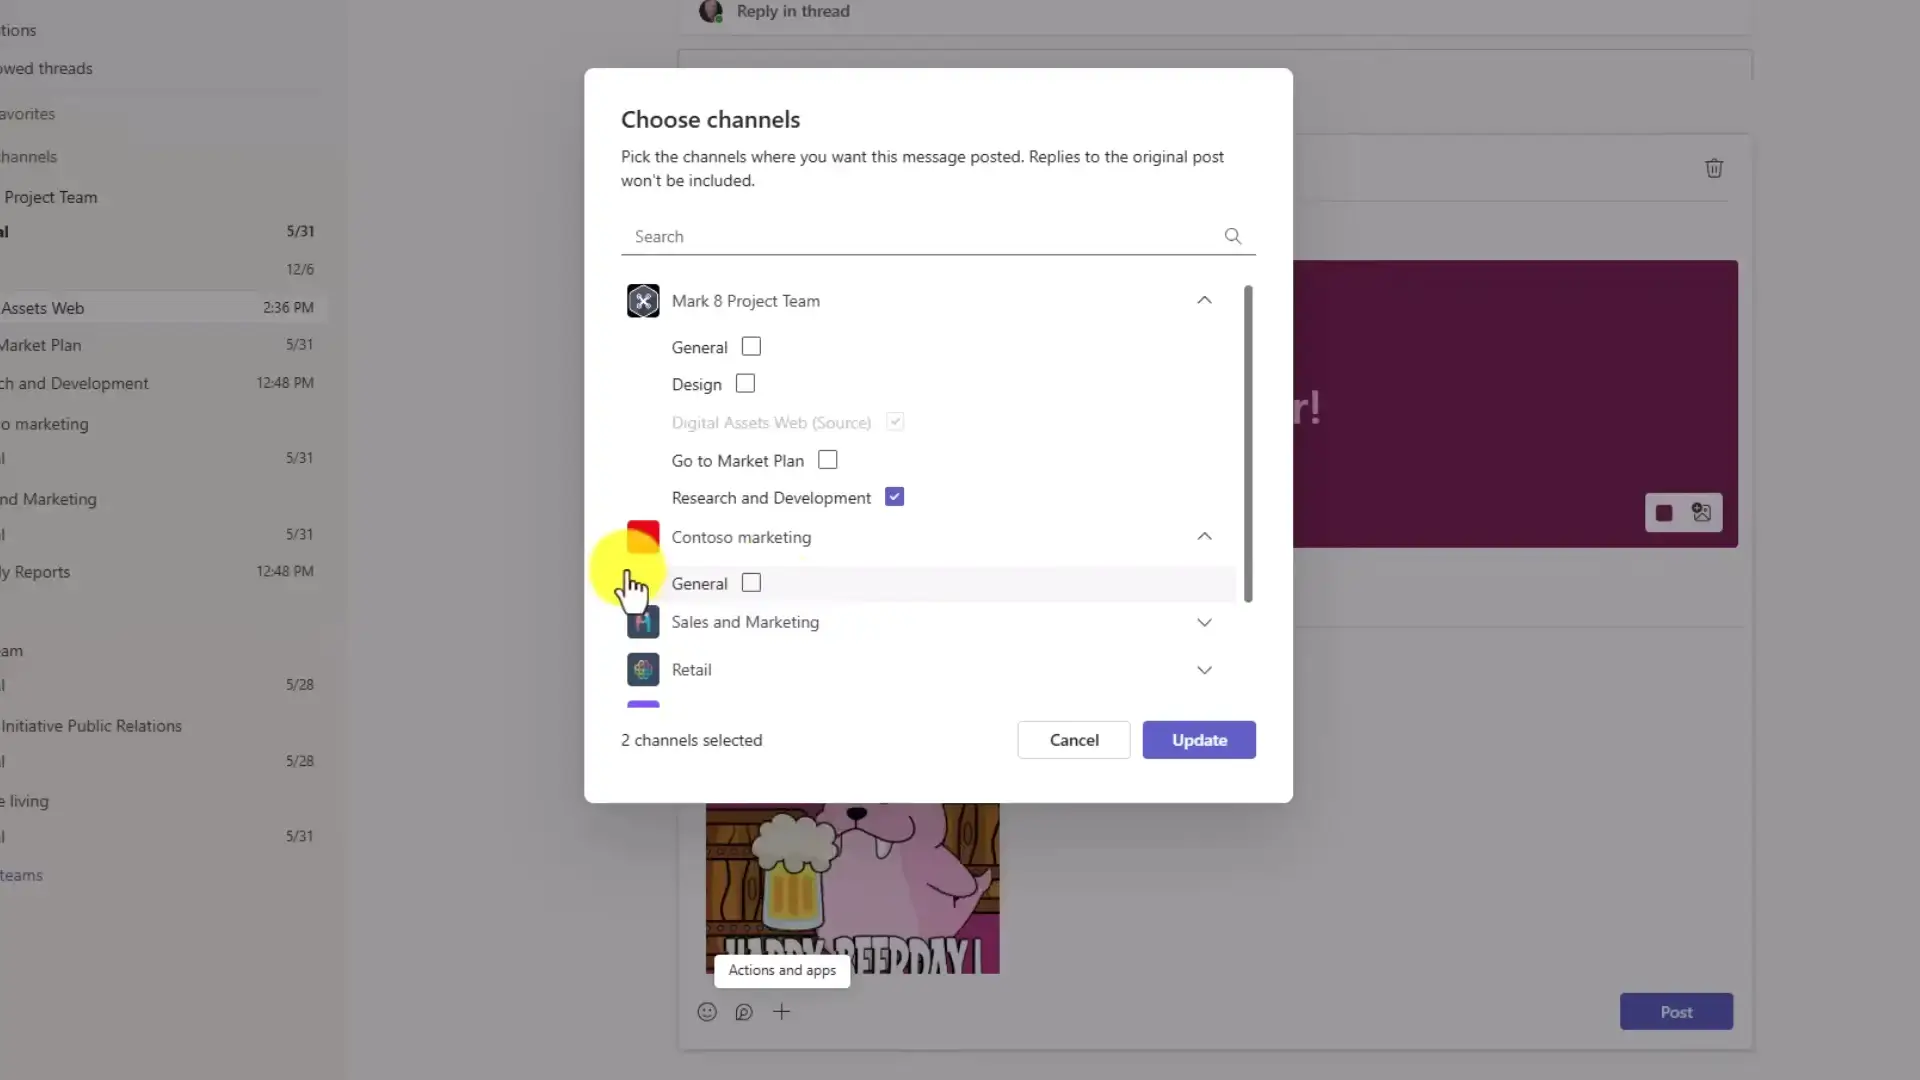
- Step 1. Start a new post in any channel.
- Step 2. Click the formatting icon to expand the full composition window.
- Step 3. Click Post in other channels at the top of the window.
- Step 4. Select every destination channel, then post once.
5
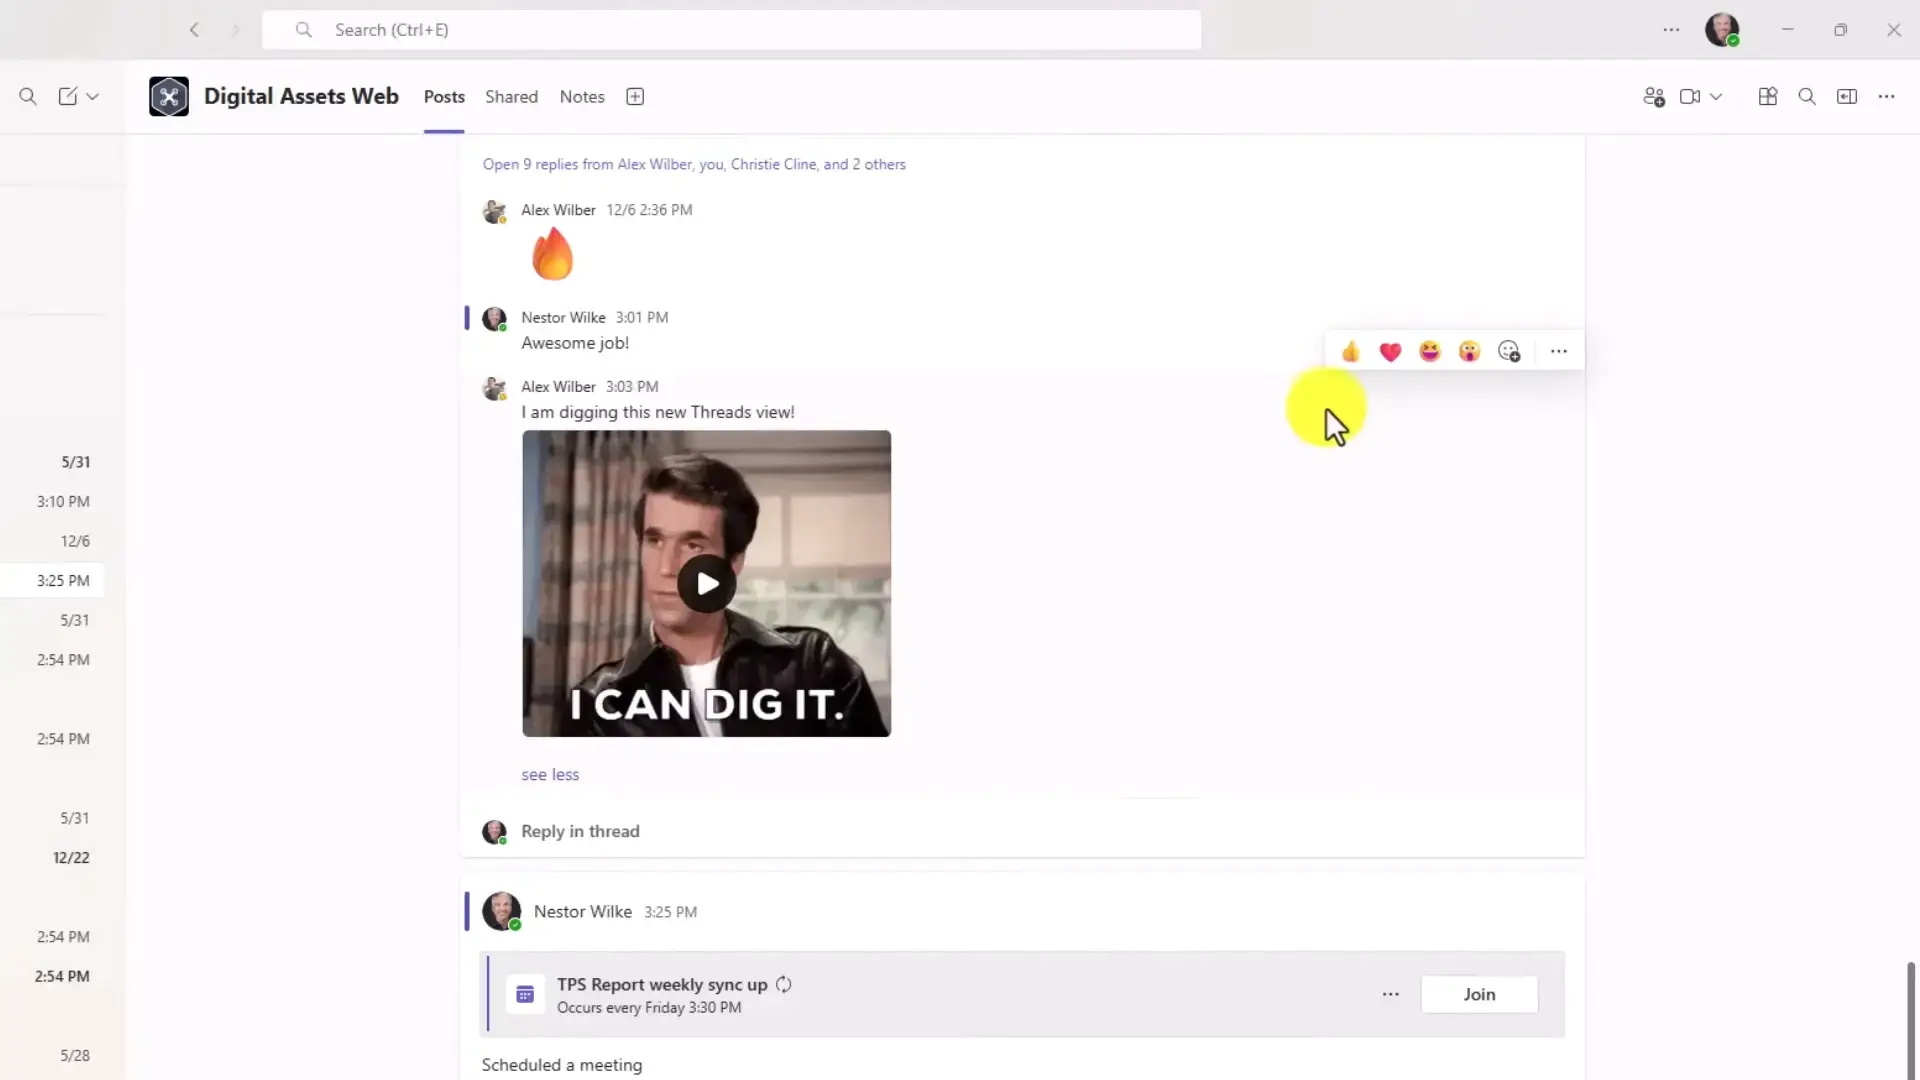
Switch a Channel to Threads View
Busy channels turn into noise fast. The Threads layout moves each conversation into its own side panel, so the main feed stays a clean list of topics instead of a wall of replies. If your team came from Slack, this view will feel like home. One catch: only team or channel owners can change a channel’s layout, so ask your owner if the option is grayed out.
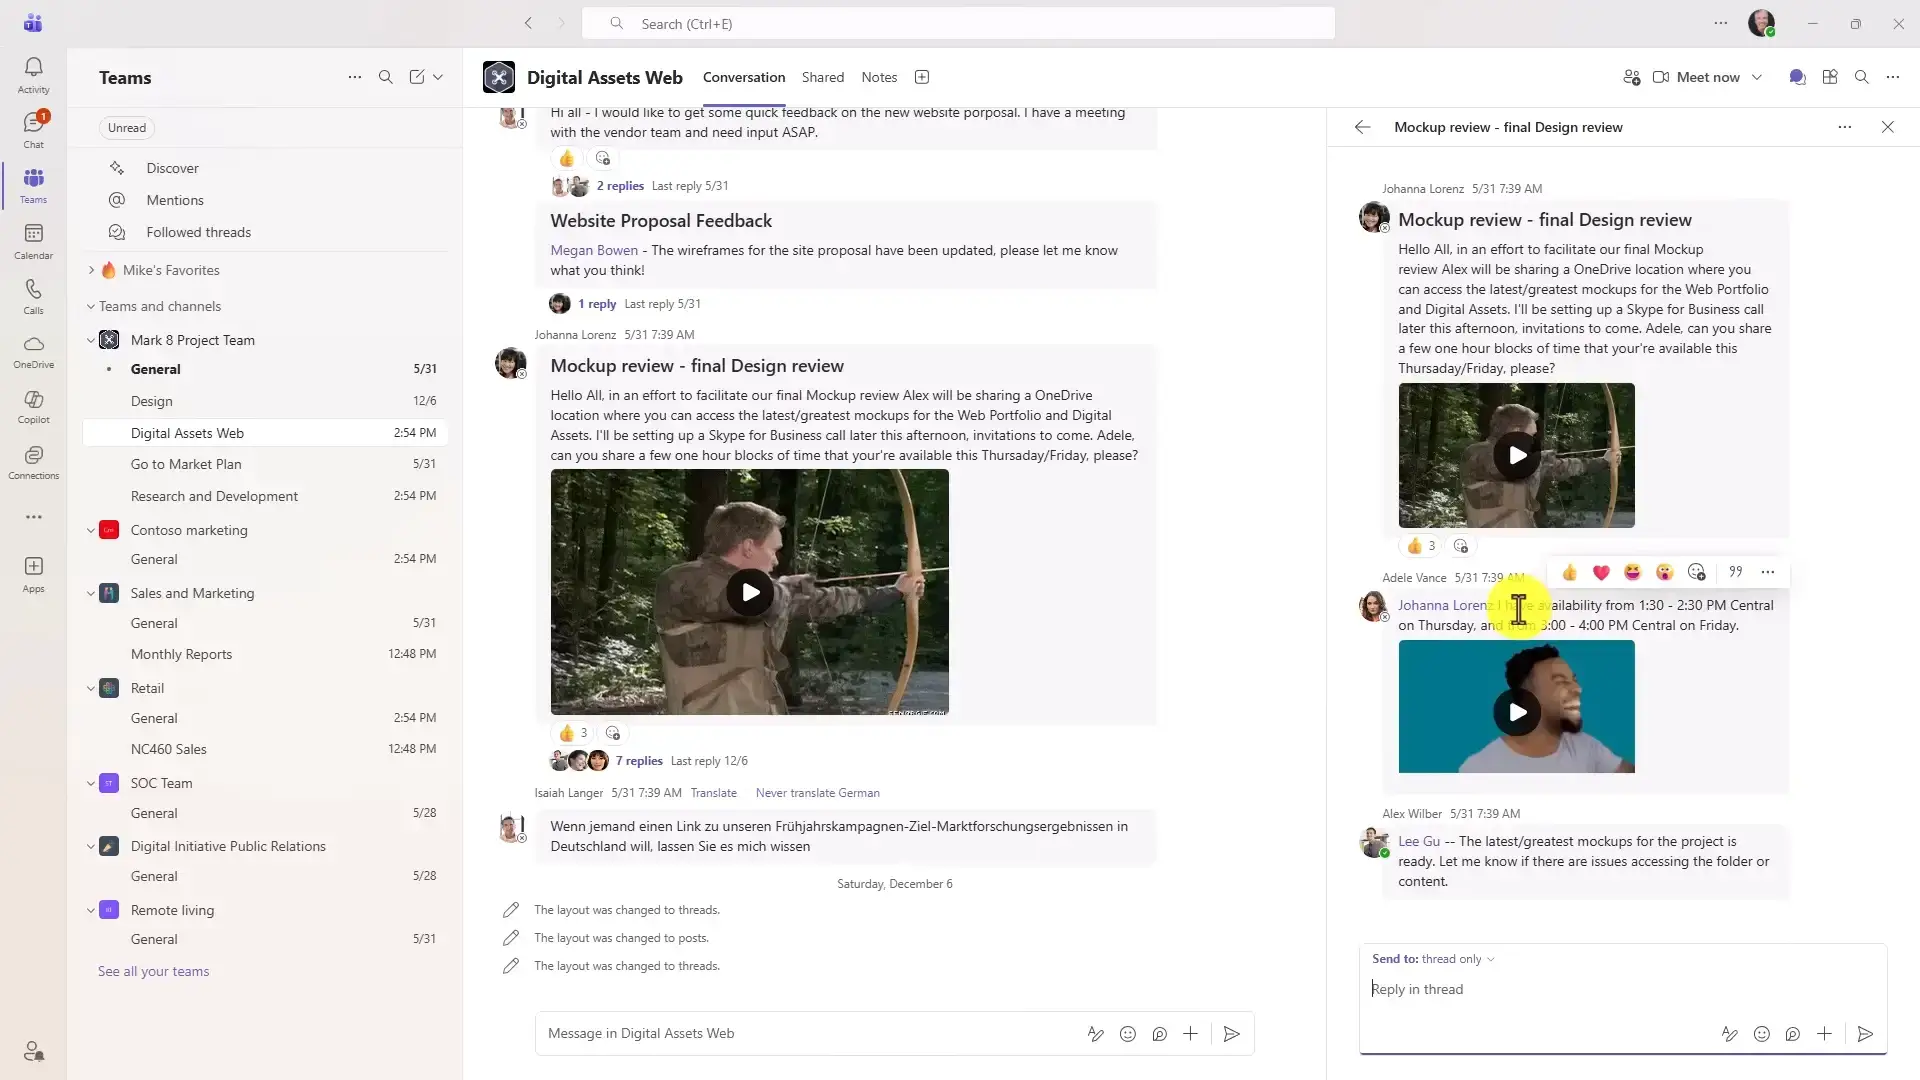
- Step 1. Click the three-dot menu next to the channel name.
- Step 2. Select Edit channel.
- Step 3. Under layout, switch from Post view to Threads and save.
- Step 4. Click any conversation to open it in the right-hand panel.
6
Send Praise Badges
Recognition works better in public. The Praise feature sends a styled badge (Team Player, Problem Solver, and more) with a personal note attached, and it takes about 20 seconds.
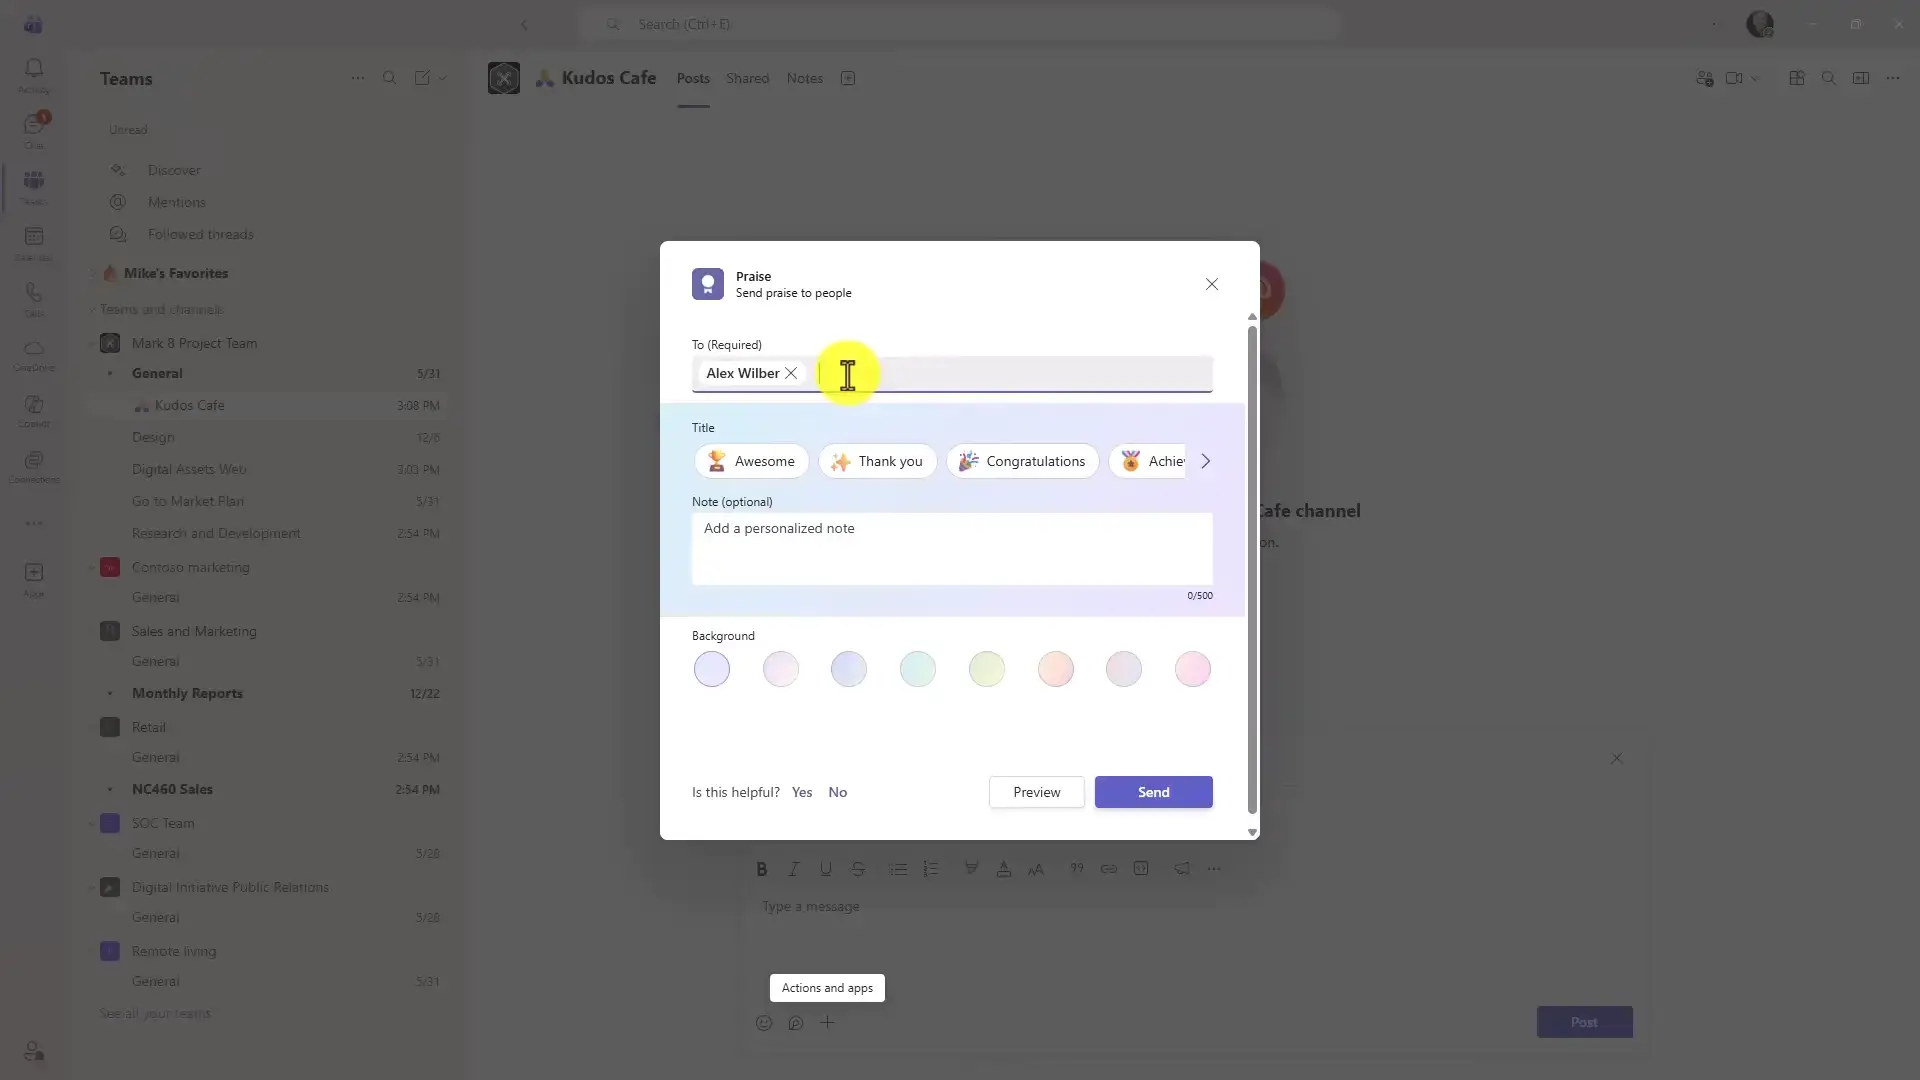
- Step 1. Open the channel or chat where you want to post.
- Step 2. Click the plus icon in the message box and select Praise.
- Step 3. Pick a badge template that fits the moment.
- Step 4. Type a personal note explaining what the person did, then send.
7
Rename Group Chats
A chat called “Sarah, James, Priya, +2” tells you nothing. Renaming a group chat to something like “Q3 Launch Planning” means you find it instantly and everyone knows what belongs there.
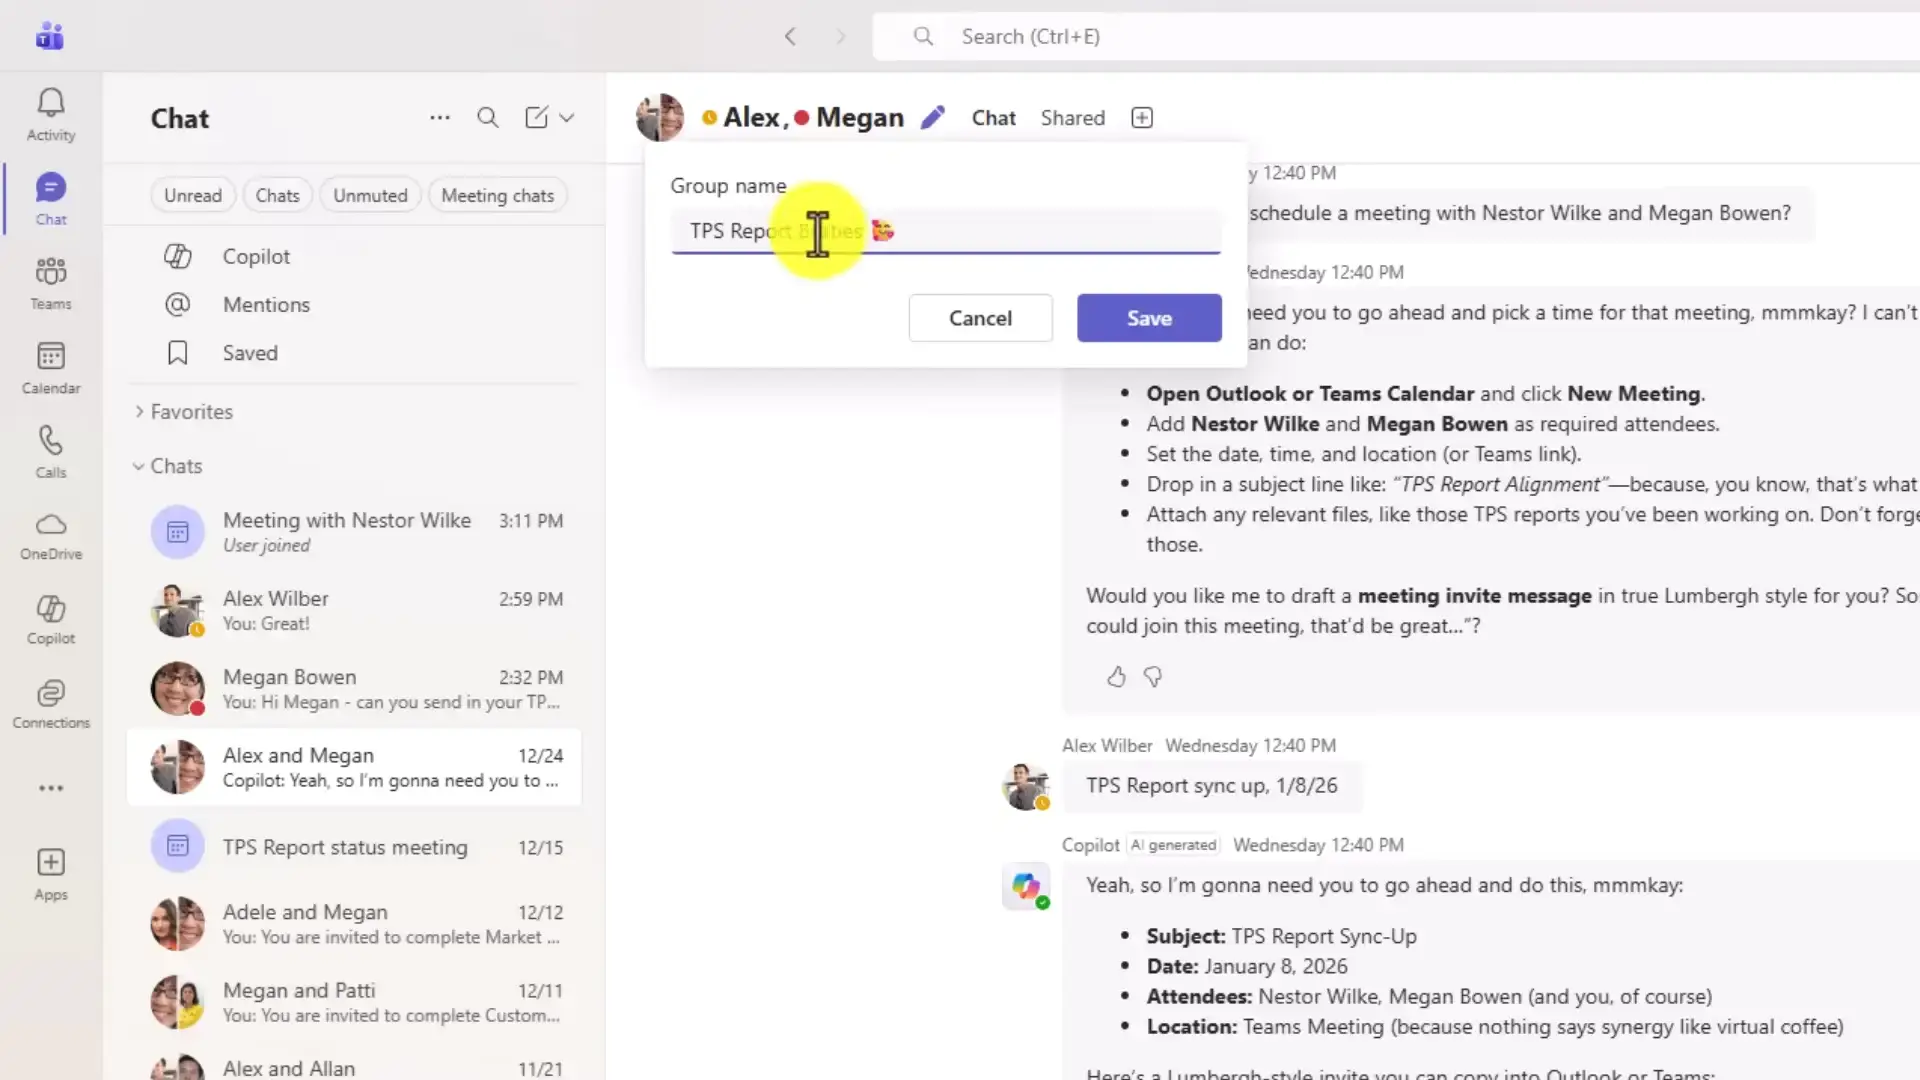
- Step 1. Open any group chat with three or more people.
- Step 2. Click the pencil icon next to the member names at the top.
- Step 3. Type a descriptive name for the group.
- Step 4. Save. The name updates for everyone in the chat.
Part 2: Interface Customization and Workspace Efficiency
The default Teams layout is built for the average user. These tips reshape it around how you actually work.
8
Combine Chats and Channels Into One List
By default, Teams splits private chats and team channels into two sections, and you bounce between them all day. The Combined view merges everything into a single stream sorted by activity.
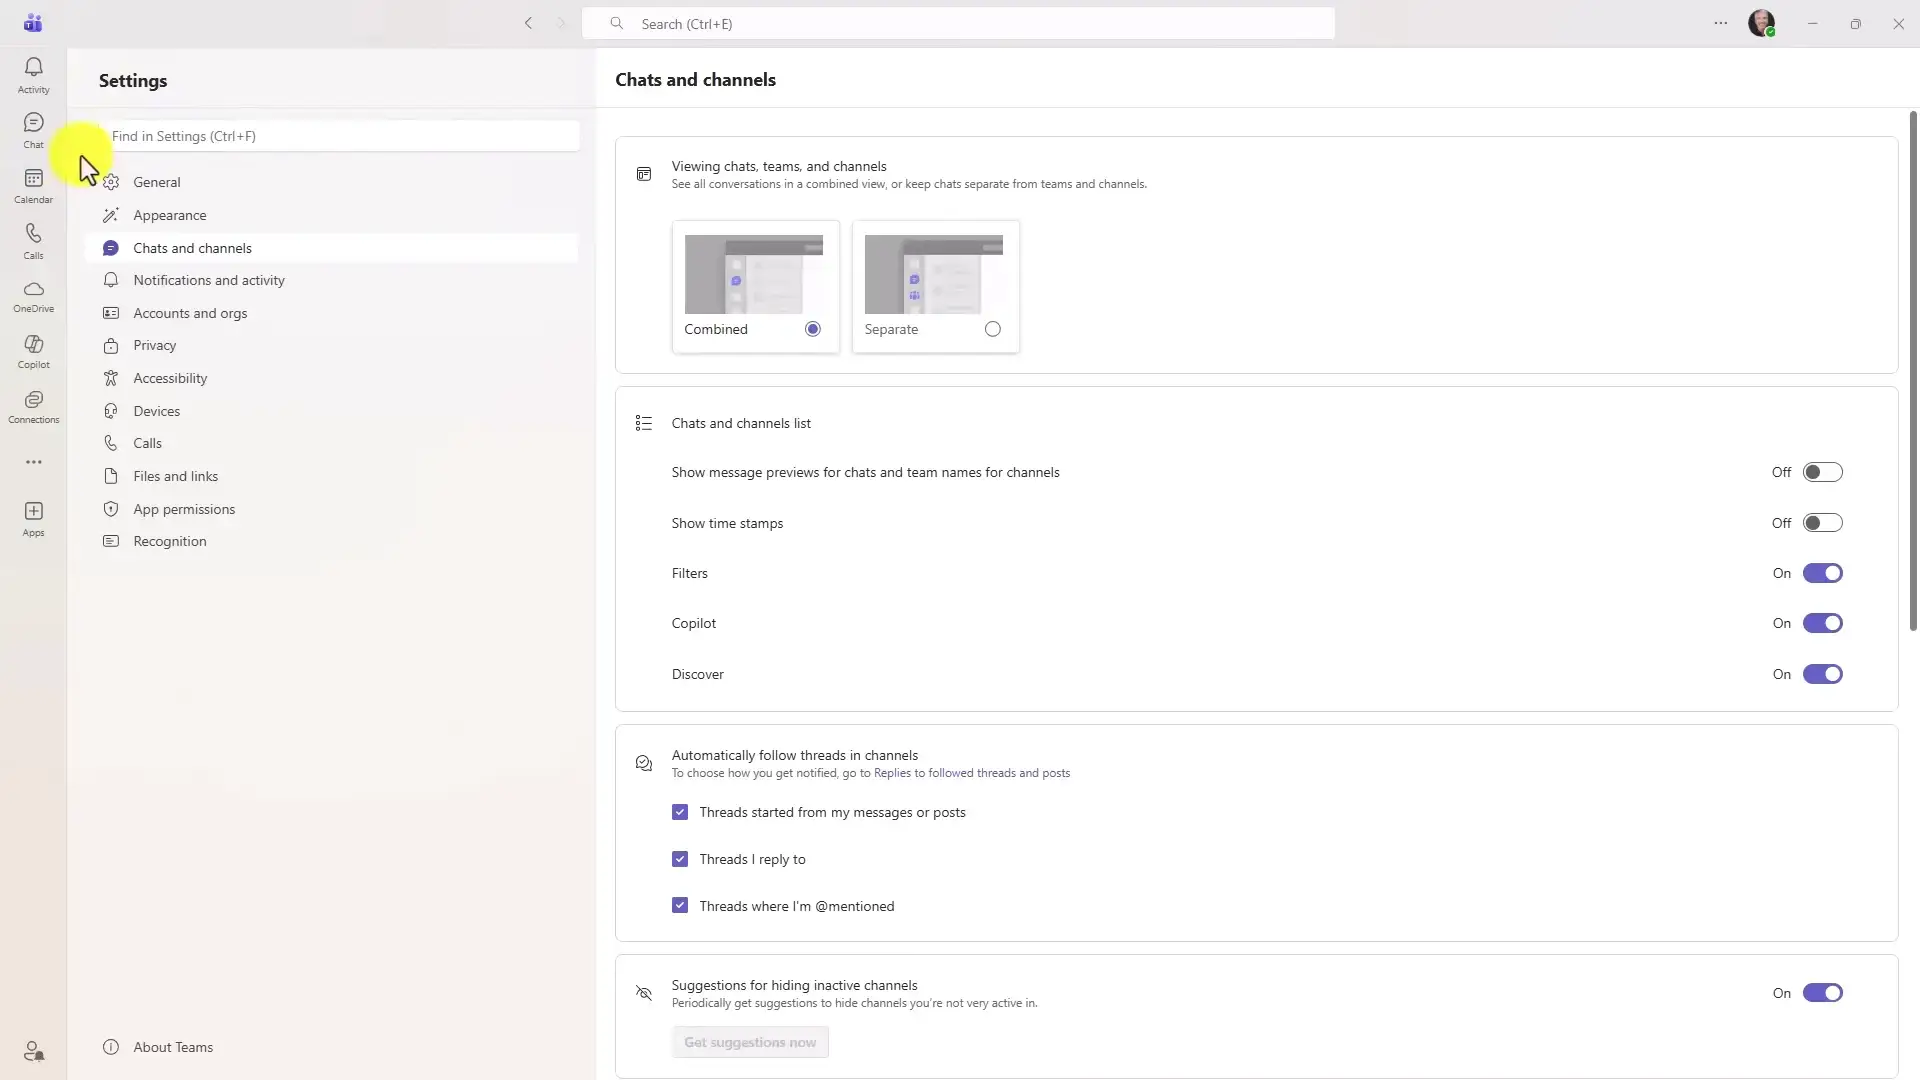
- Step 1. Click your profile picture and open Settings.
- Step 2. Select Chats and channels.
- Step 3. Change the layout from Separate to Combined.
- Step 4. Your sidebar now shows chats and channels together in one list.
9
Group Conversations Into Sections
Sections are custom folders for your sidebar. Put your five most important chats and channels in a section at the top, and stop scrolling past thirty dormant ones to find them.
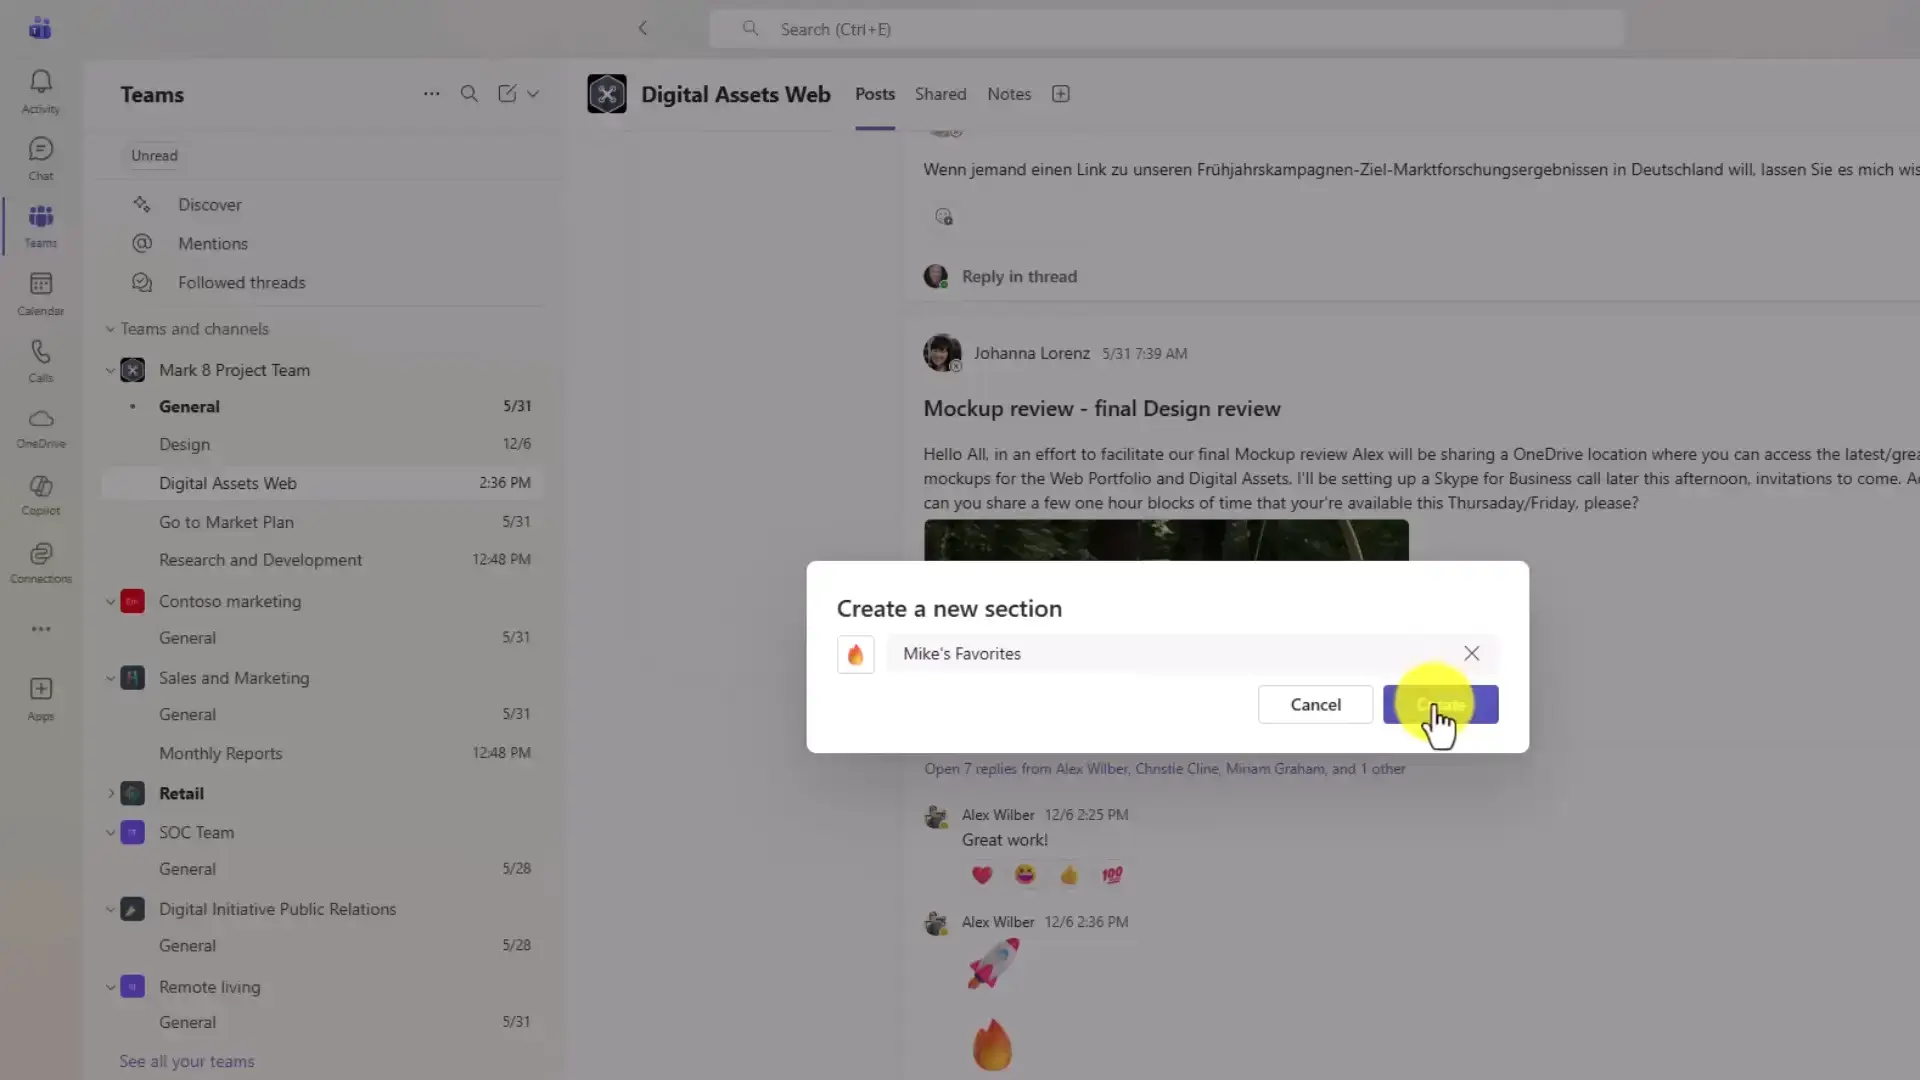
- Step 1. Click the dropdown at the top of your sidebar.
- Step 2. Choose New section.
- Step 3. Pick a name and icon, for example “Daily” or “Clients”.
- Step 4. Drag and drop chats and channels into the section.
10
Move and Shrink Notification Popups
Teams notifications land in the bottom-right corner by default, right where they cover other work. You can move them to any corner and switch to a compact style that takes half the space.

- Step 1. Open Settings and go to Notifications and activity.
- Step 2. Under the Display options, find Position on the screen and pick a new corner: top-left, top-right, bottom-left, or bottom-right.
- Step 3. If your version shows a notification style option, switch it to Compact for smaller popups.
- Step 4. Send yourself a test message to check the new placement. The change applies right away, there is no save button.
11
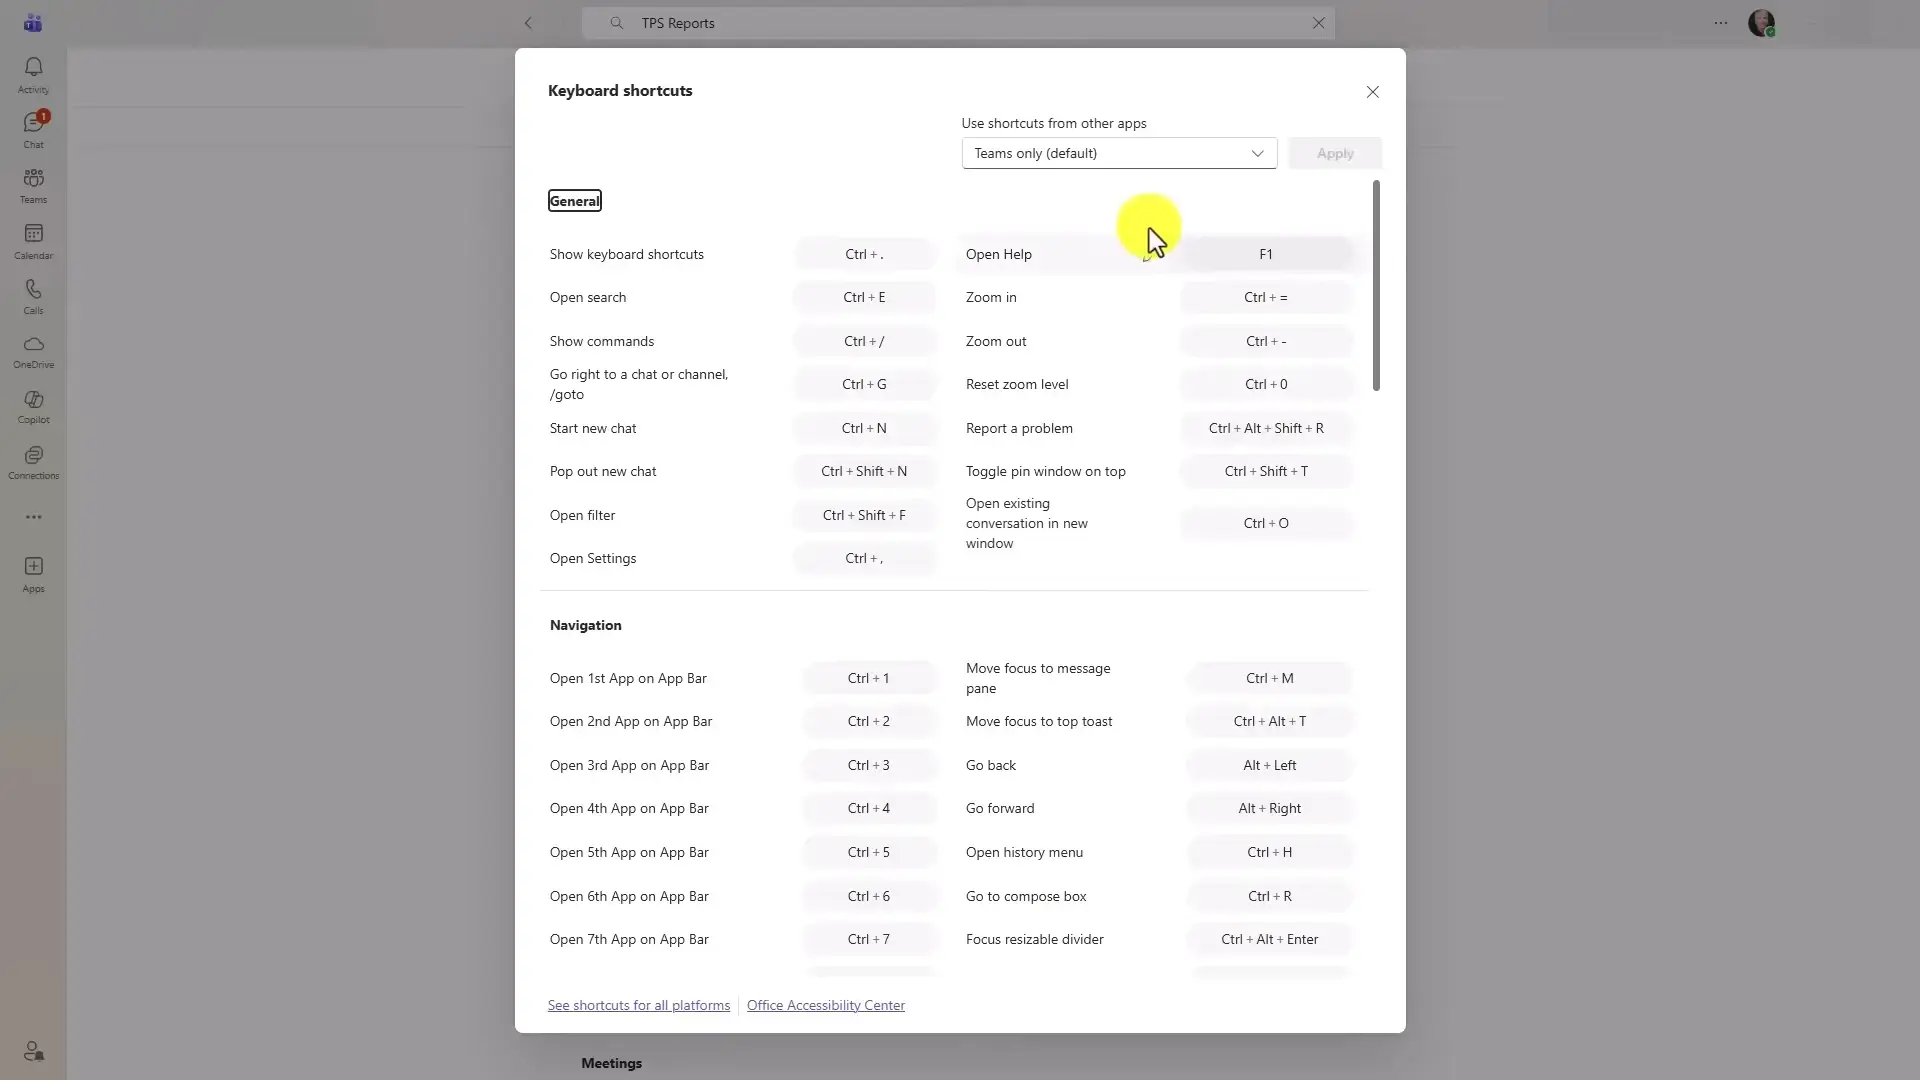
Learn the Core Keyboard Shortcuts
The fastest Teams users barely touch the mouse. Three shortcuts cover most of your day: Ctrl + 1 through 8 jumps between the apps in the left rail (the icon column on the left edge of the window), Ctrl + E puts your cursor in the search bar, and Ctrl + Shift + X expands the message formatting box. The full quick reference table is at the bottom of this guide.
12
Use Multiple Reactions and Emoji Shortcodes
Reactions are no longer limited to one per message. You can stack multiple different emoji on a single post, and set a default skin tone that applies everywhere.
- Step 1. Hover over a message and add several different reactions, not just one.
- Step 2. Go to Settings > Appearance to set your universal skin tone preference.
- Step 3. In any text field, type a colon, the emoji name, and another colon (like :fire:) to insert an emoji without opening the picker.
13
Pop Out Chats Into Separate Windows
If you work with two monitors, this one changes everything. Any chat or channel can be detached into its own floating window, so you keep a key conversation open while working elsewhere in Teams.
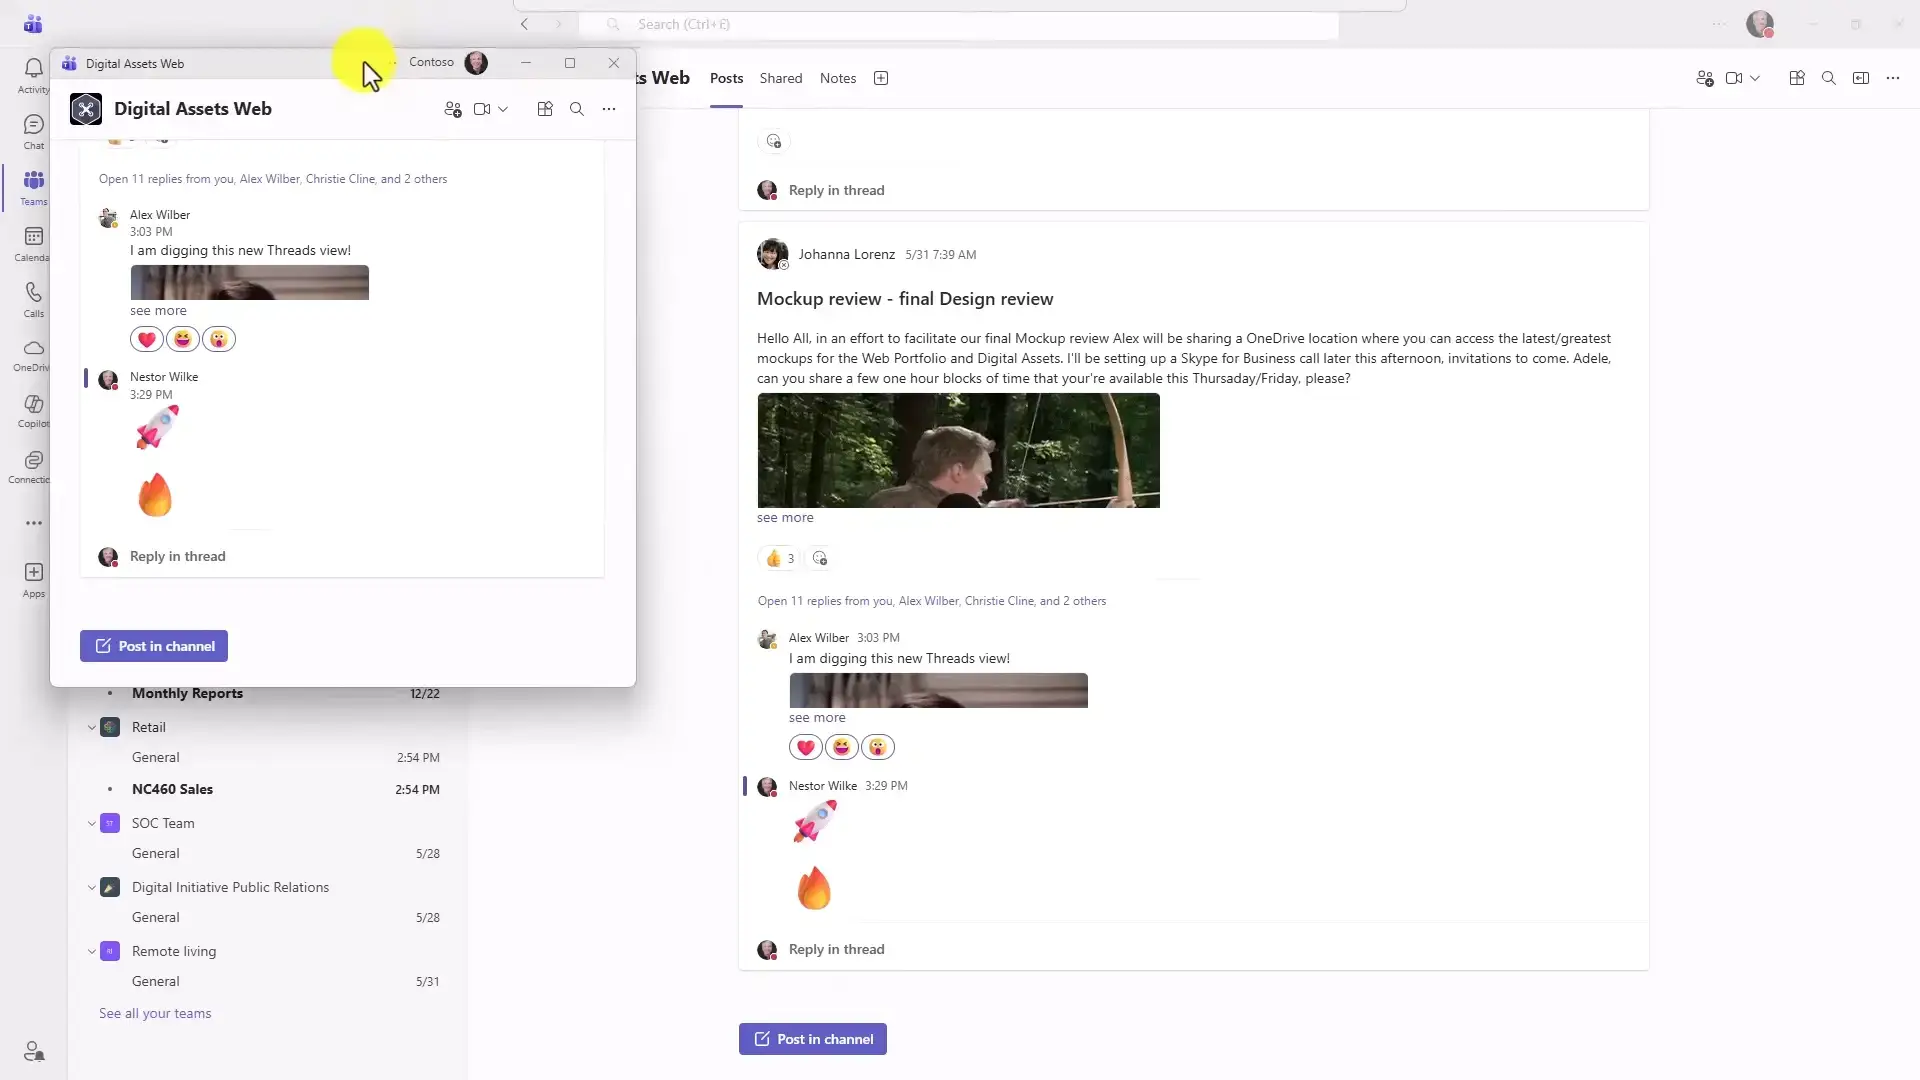
- Step 1. Find the chat or channel in your sidebar.
- Step 2. Click the three-dot menu next to its name.
- Step 3. Select Open in new window.
- Step 4. Drag the window to your second monitor and keep working.
14
Resize or Collapse Interface Panels
The Teams layout is not fixed. Every major panel border can be dragged wider, narrower, or collapsed completely, which matters a lot on laptops where screen space is tight.
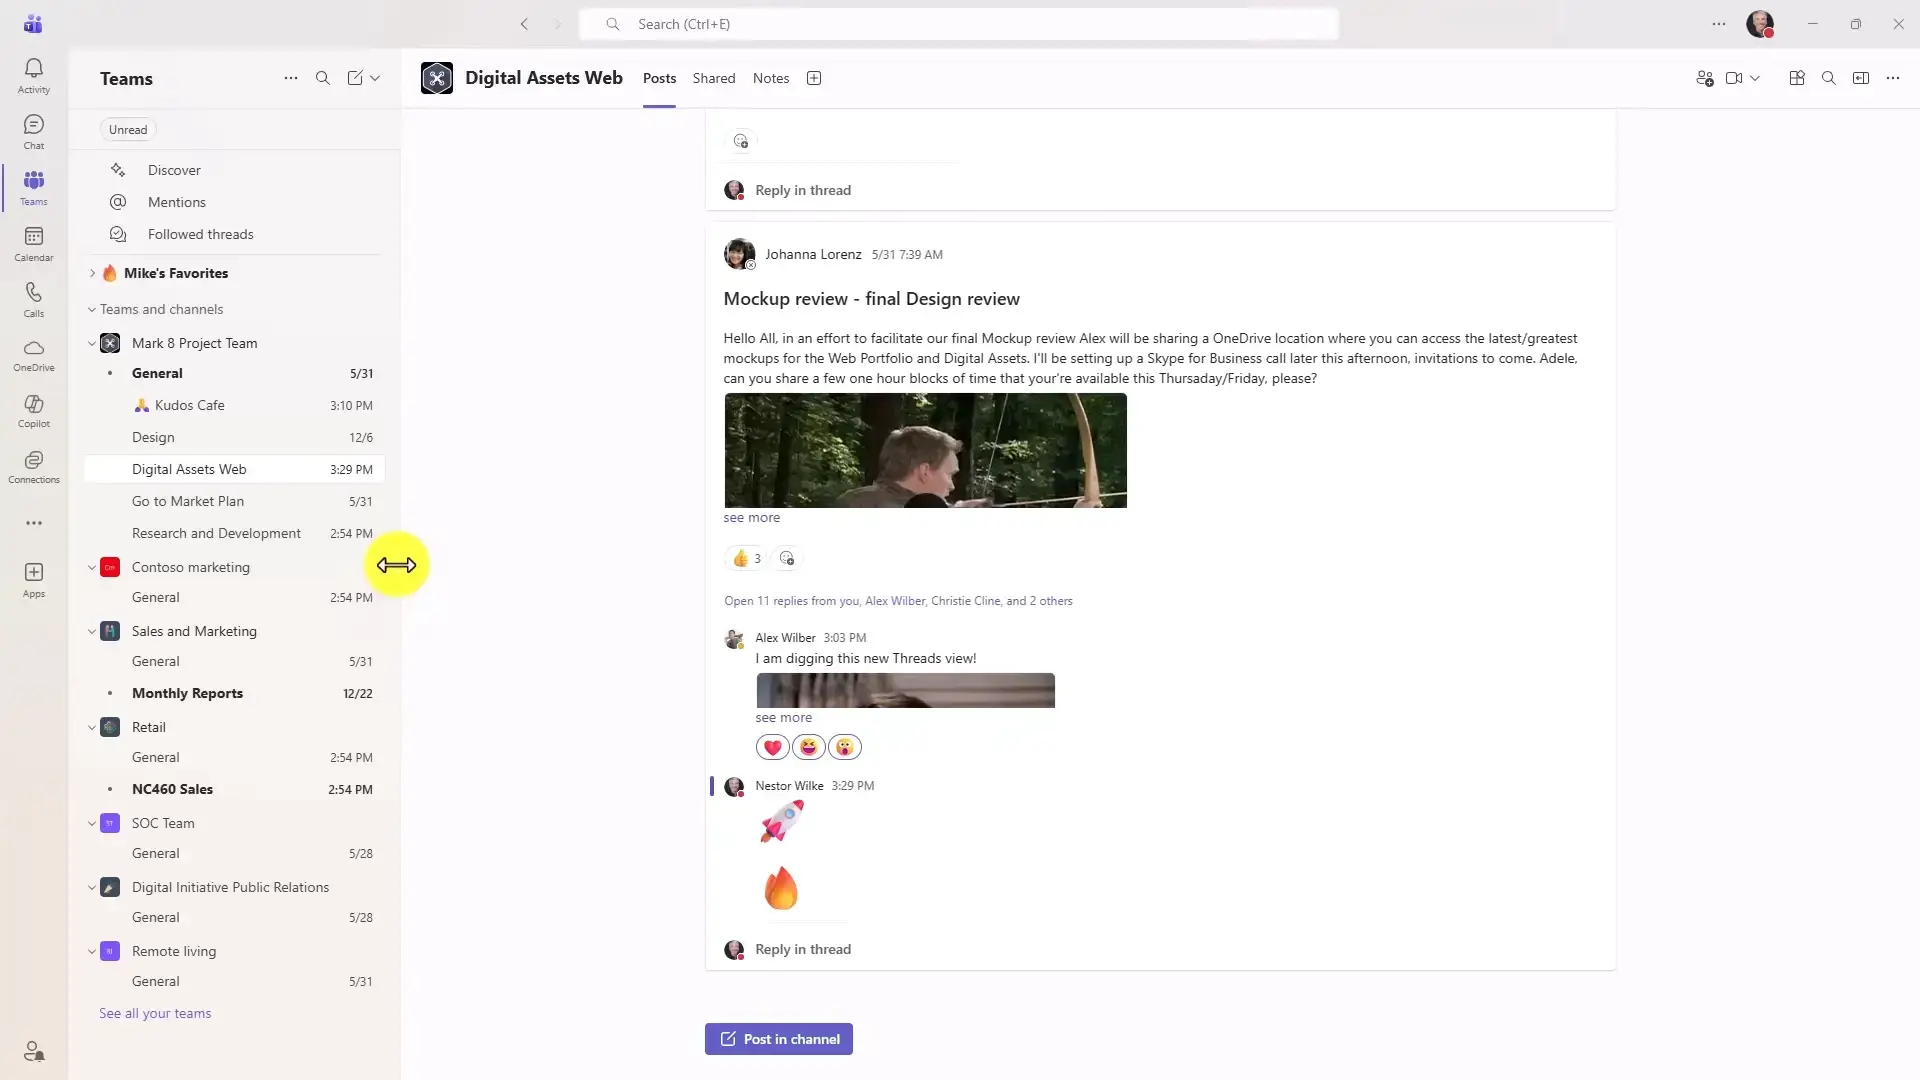
- Step 1. Hover over the vertical border between the sidebar and the main content area.
- Step 2. When the cursor changes to a resize arrow, drag left or right.
- Step 3. Drag a panel all the way in to collapse it entirely.
- Step 4. Do the same with the channel details pane on the right.
Part 3: Next-Gen Calendar and Modern Meeting Management
Meetings are where Teams gained the most in recent updates. These tips keep them shorter and under your control.
15
Explore the New Calendar View
The Teams calendar now matches Outlook’s depth. You get month, day, and work week views, color-coded categories, and group calendar tracking without leaving Teams.
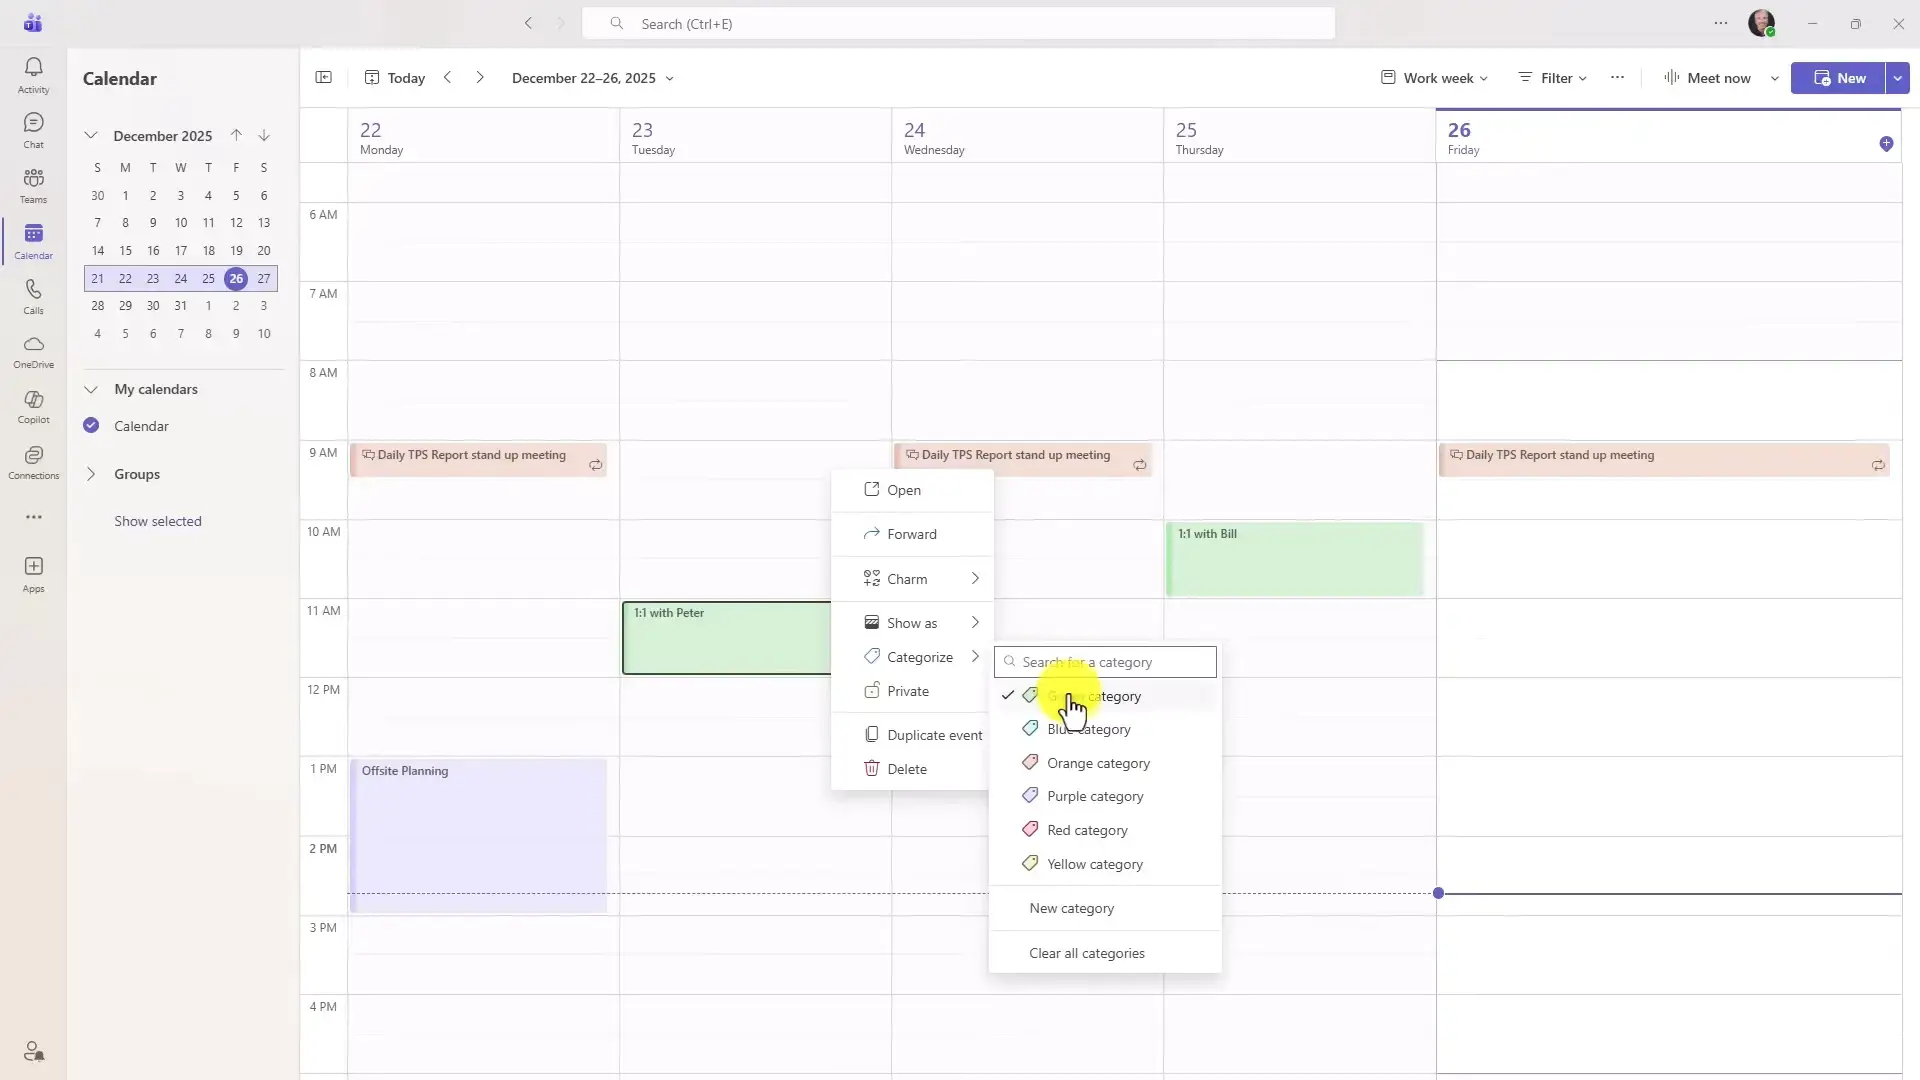
- Step 1. Open the Calendar app from the left rail.
- Step 2. Use the view dropdown to switch between month, day, or work week.
- Step 3. Open the filter panel to sort events by custom color categories.
- Step 4. Add group calendars to see team schedules side by side.
16
Copilot Chat: AI in Your Left Rail
Top Pick
Copilot lives as a permanent icon in the Teams navigation rail. It can summarize documents, draft content, and answer questions about your own files, all inside your organization’s security boundary. The most useful trick is the forward-slash file reference: type / in a prompt and Copilot lets you attach a recent document, then work directly against its contents.
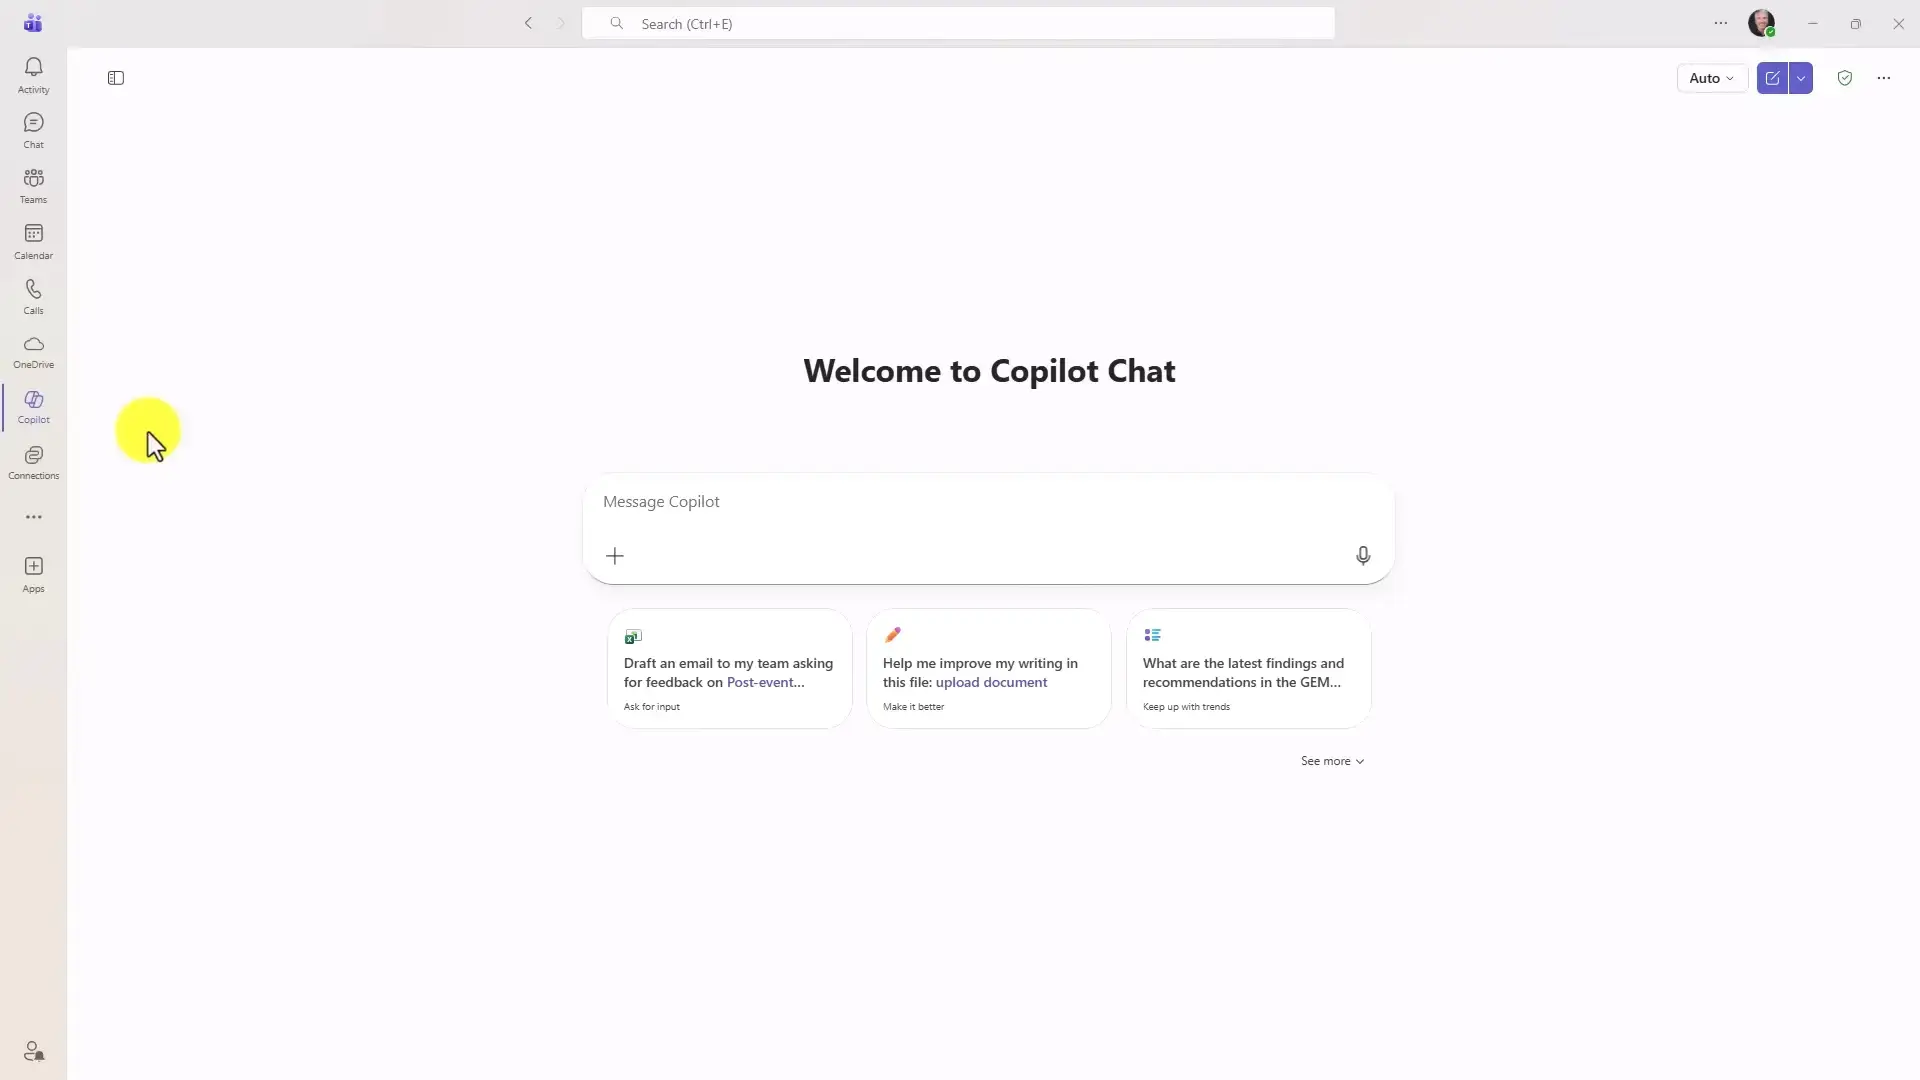
- Step 1. Click the Copilot icon in the left rail.
- Step 2. Type a prompt, like “Summarize the key risks in this document”.
- Step 3. Type / to open the file picker and select a recent file or PowerPoint deck.
- Step 4. Copilot reads the file and answers using its actual contents.
17
Use the Unified Meeting Controls Menu
Meeting settings used to be scattered across four different menus. They now live in one central controls menu, so you can manage who gets in, who presents, and who can share, all from one place mid-call.
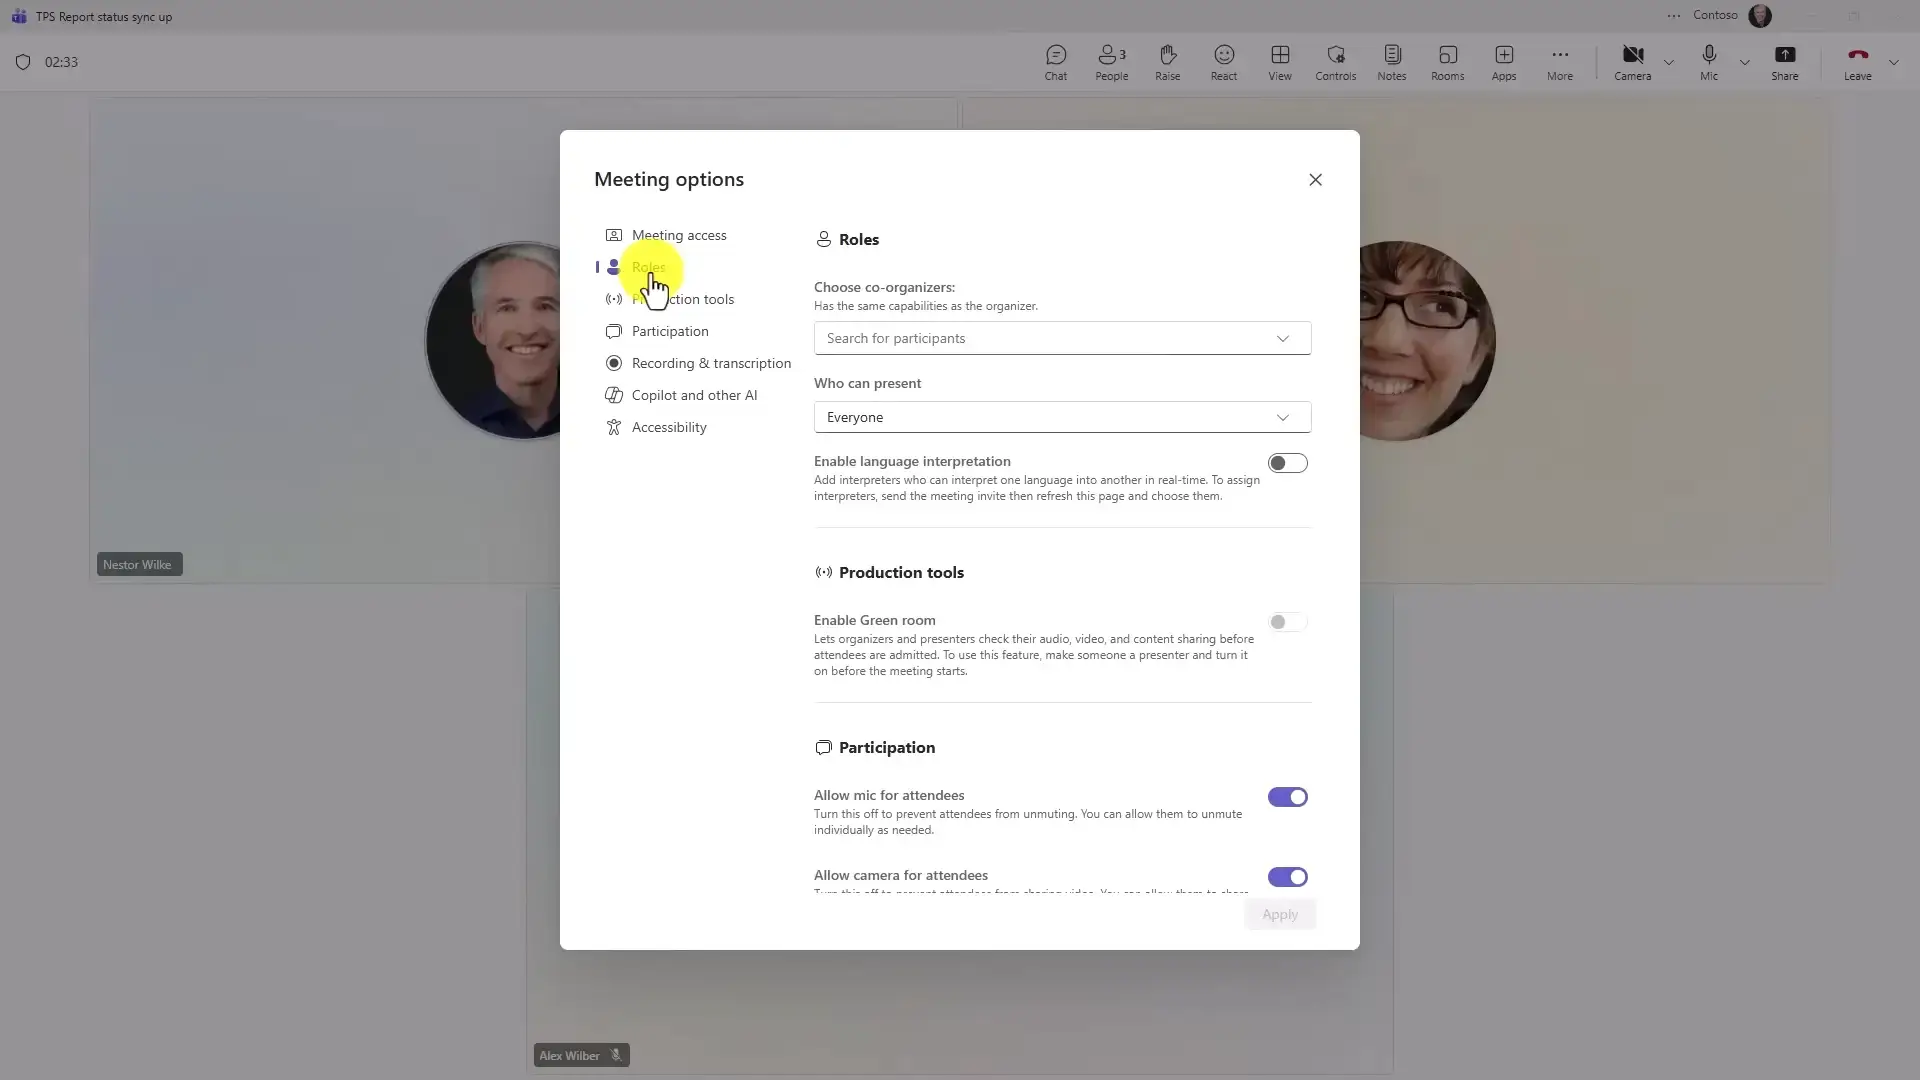
- Step 1. During a meeting, open the central controls menu in the toolbar.
- Step 2. Adjust the lobby rules (the waiting room people sit in before being let into a call) to control who enters directly.
- Step 3. Change presenter roles for specific attendees.
- Step 4. Toggle screen-sharing permissions on or off for the room.
18
Add a Visible Meeting Timer
Meetings drift without a clock. The built-in Timer puts a shared countdown in front of every participant, which does more for staying on schedule than any polite reminder.
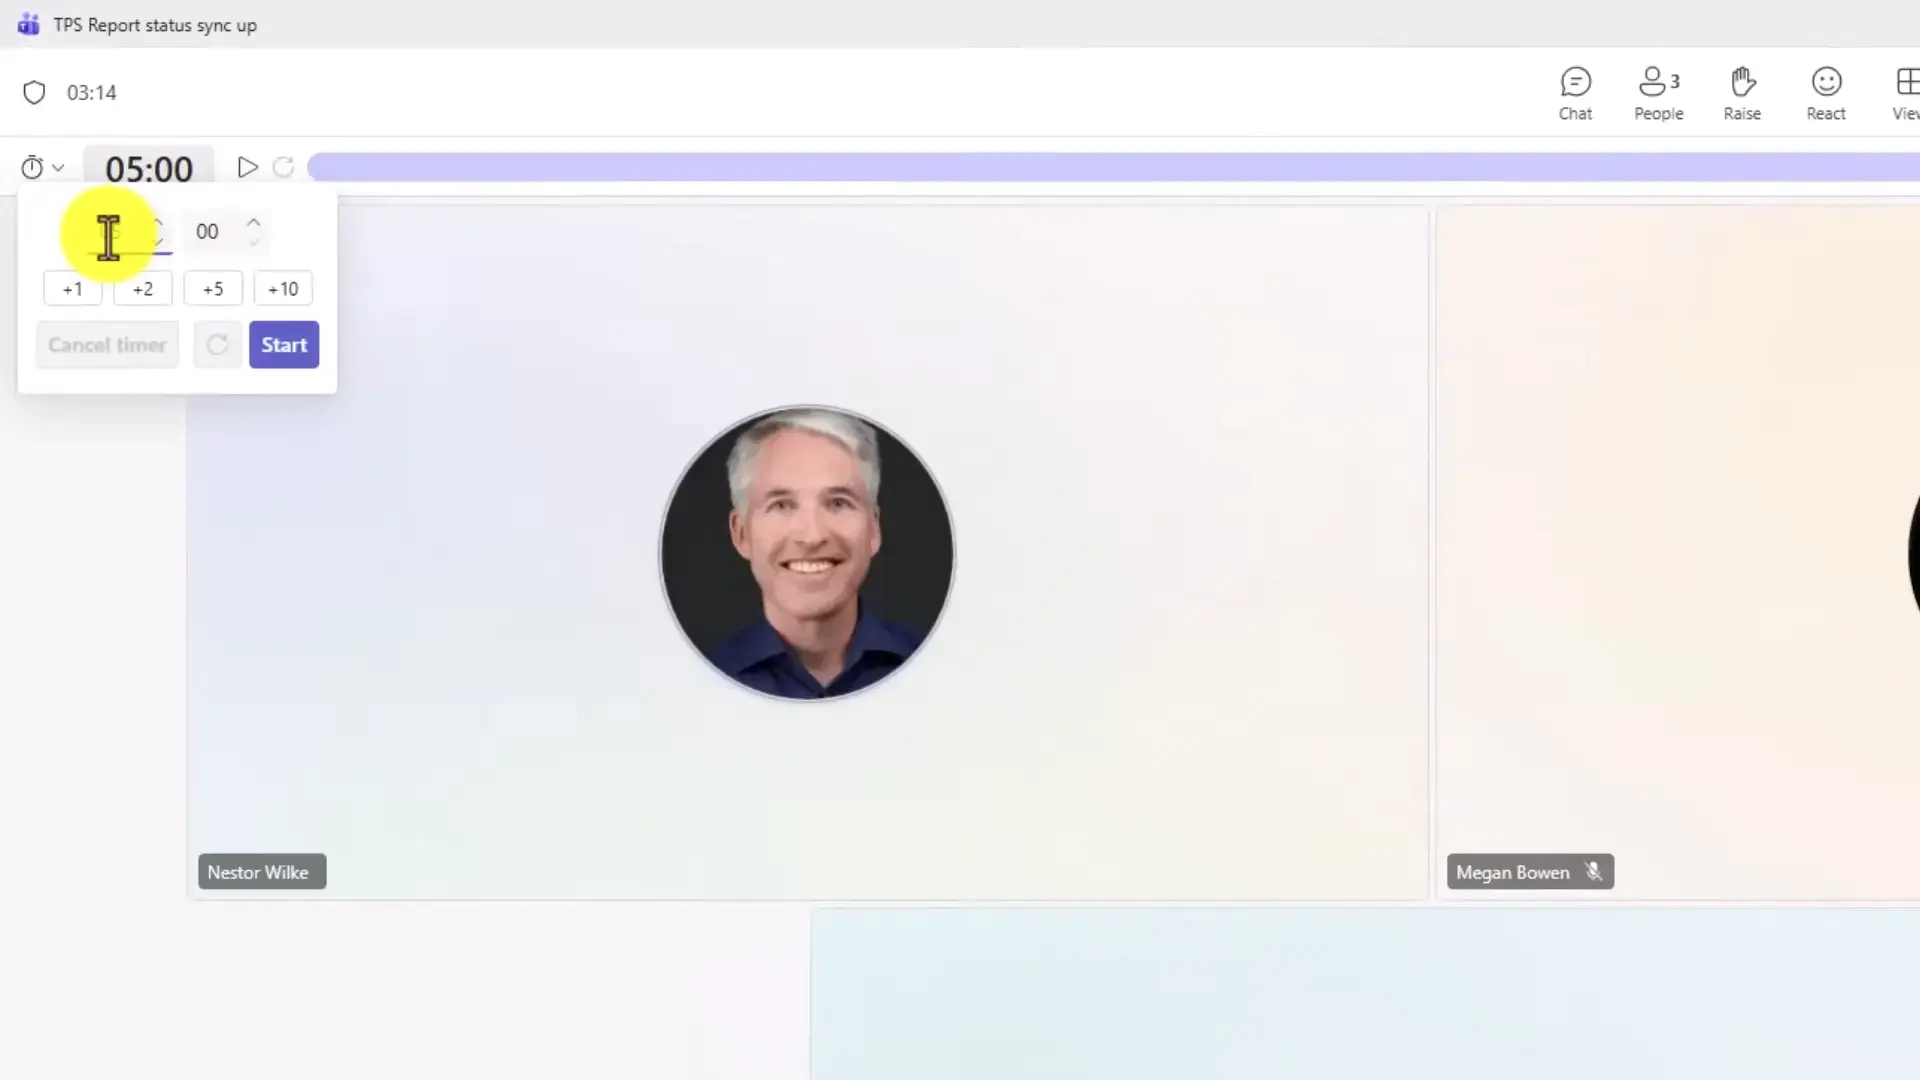
- Step 1. In the meeting toolbar, click More actions.
- Step 2. Select Timer.
- Step 3. Set your duration, like 5 minutes for a round of updates.
- Step 4. Hit Start. Everyone sees the same countdown at the top of the meeting.
19
Know the Difference: Leave vs End Meeting
If you are the organizer and you just close the window, the meeting can keep running and cloud recording can keep rolling. The dropdown next to the red button gives you two very different exits.
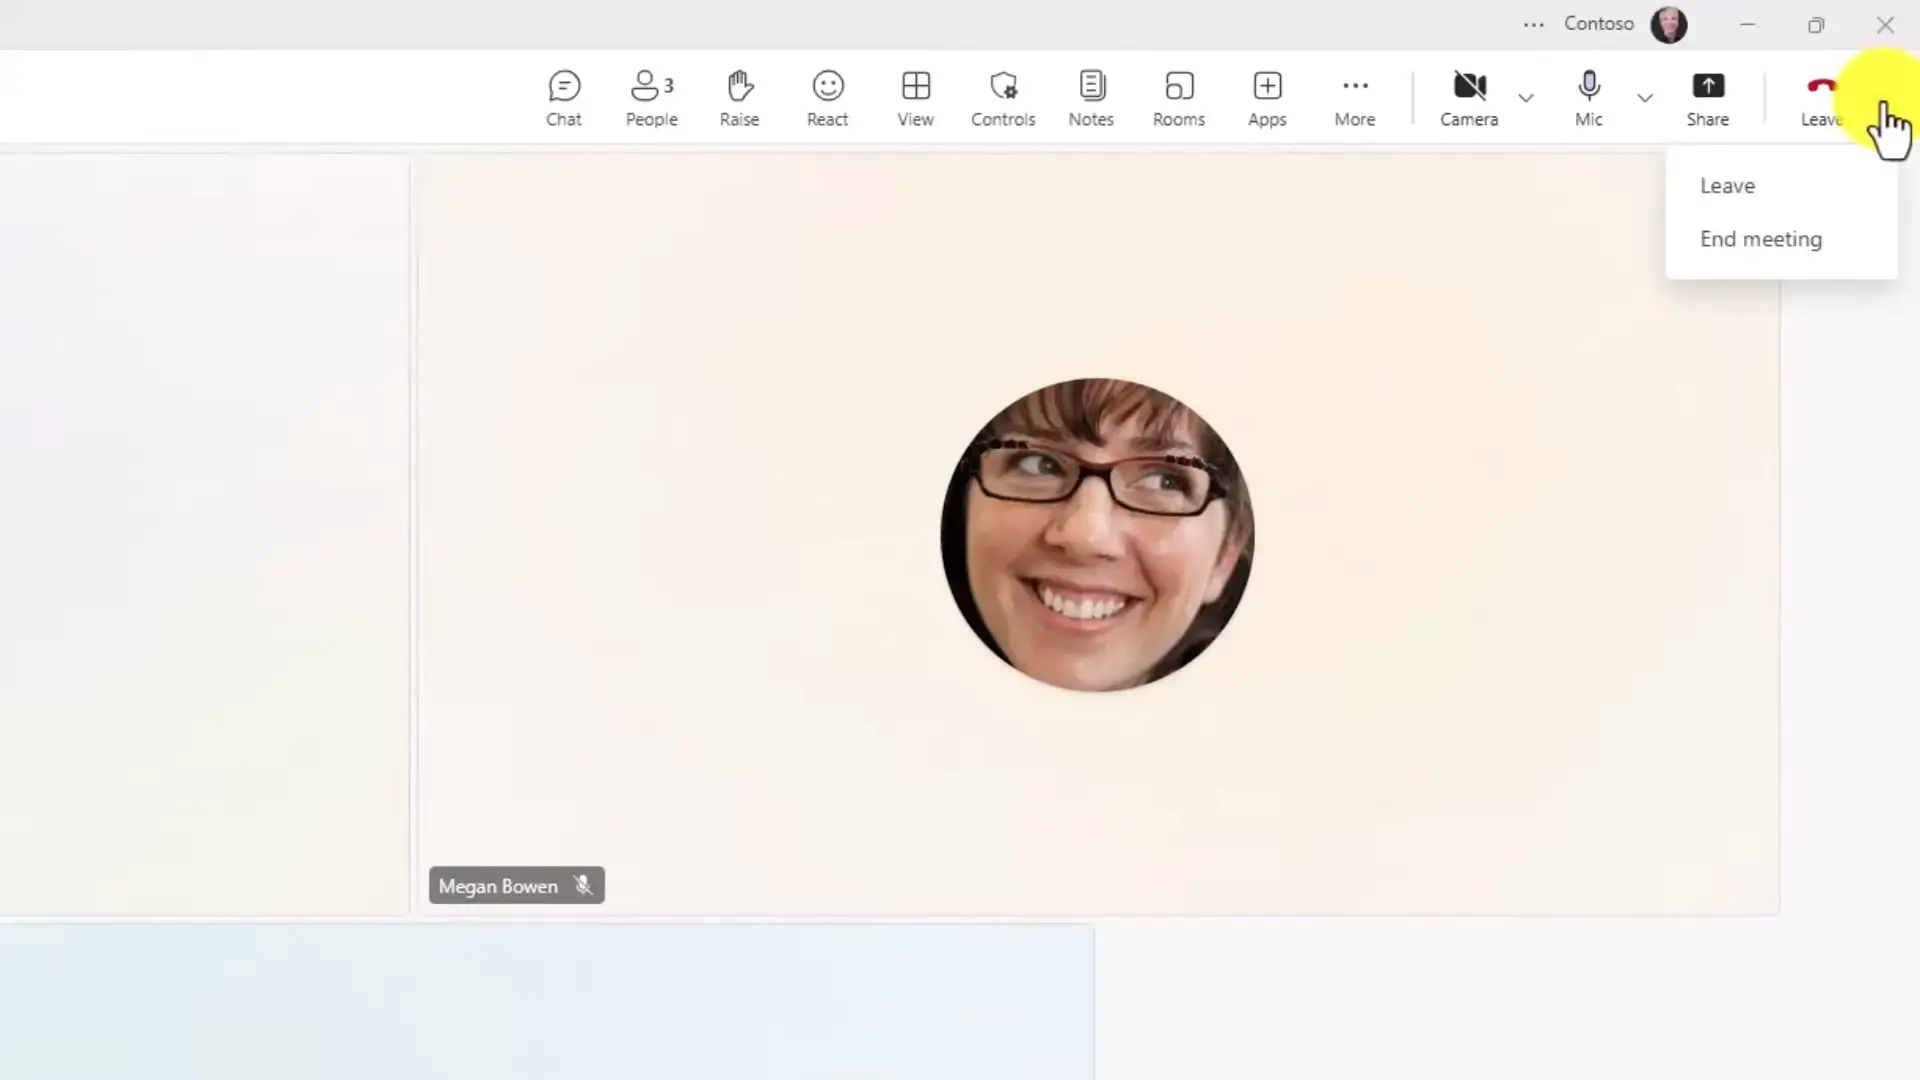
- Step 1. Click the dropdown arrow next to the red leave button.
- Step 2. Choose Leave to exit quietly while the meeting continues for others.
- Step 3. Choose End meeting to disconnect everyone and stop any recording immediately.
- Step 4. Organizers should default to End meeting when the call is actually over.
20
Send Personal Invites for Channel Meetings
Channel meetings have a known flaw: they post to the channel but do not land on anyone’s personal calendar, so people simply forget them. One toggle fixes it.
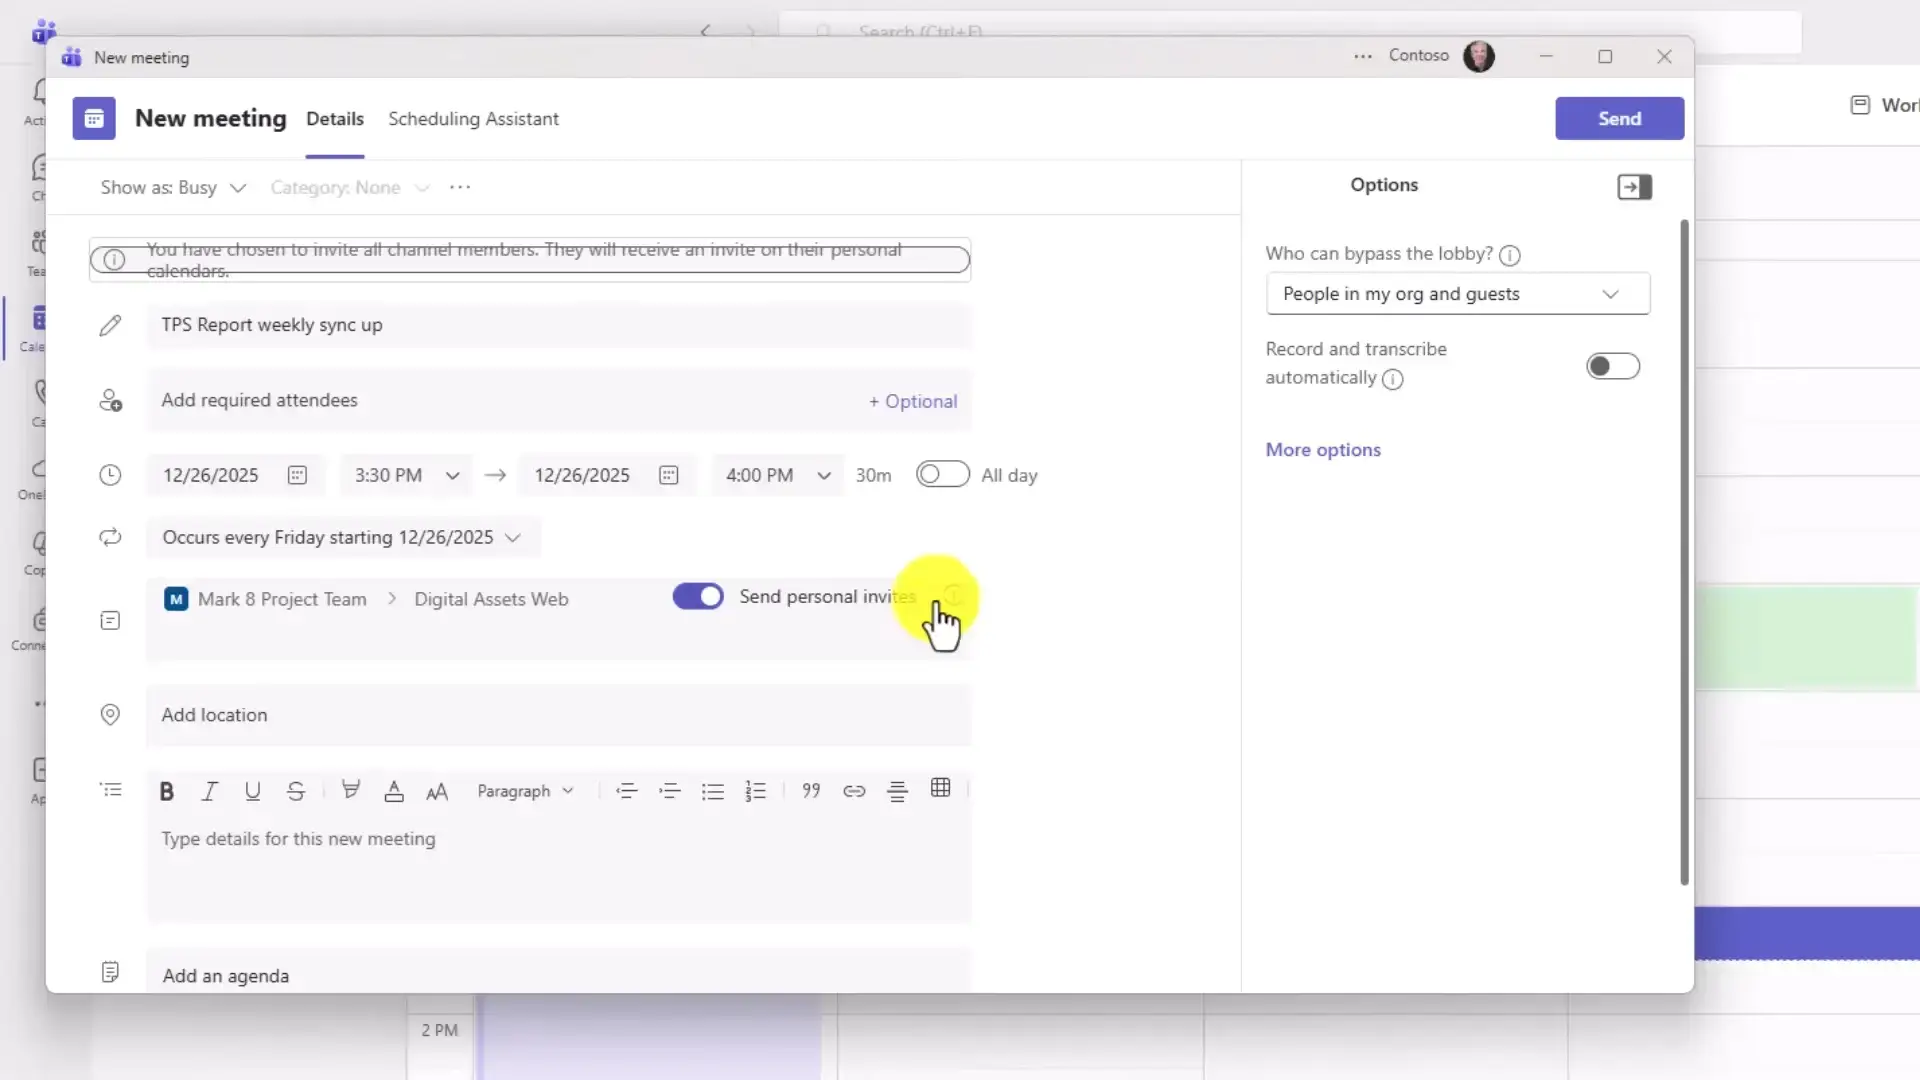
- Step 1. Open the Teams calendar and select Channel meeting.
- Step 2. Fill in your recurrence rules for the sync.
- Step 3. Select the target team channel the meeting belongs to.
- Step 4. Toggle on Send personal invites. Every member now gets it on their own calendar.
Where to start: Do not try all of these at once. Pick the three that match your biggest daily annoyance, use them for a week, then come back for more. Habits stick better in small batches.
Video Guide
Watch Mike Tholfsen’s walkthrough to see these Teams tips demonstrated live on a Windows PC, including Loop components, message scheduling, and the meeting controls.
Keyboard Shortcut Quick Reference
Every shortcut covered in this guide, in one scannable table.
| Shortcut | Action |
|---|---|
| Ctrl + 1 to Ctrl + 8 | Jump between apps in the left rail (Activity, Chat, Teams, Calendar, and more) |
| Ctrl + E | Jump to the search bar from anywhere |
| Ctrl + Shift + X | Expand the message formatting box |
| Ctrl + Period (.) | Open the full directory of all keyboard shortcuts |
Frequently Asked Questions
Support and Community
- Microsoft Teams help center: official how-to articles and troubleshooting from Microsoft.
- r/MicrosoftTeams on Reddit: active community for Teams tips, admin questions, and feature news.
- Microsoft 365 roadmap: see which Teams features are rolling out next to your organization.
More Windows software guides: Microsoft Teams for Windows · AI Agents in Microsoft Teams · Excel with Copilot Tips
Discover more from Windows Mode
Subscribe to get the latest posts sent to your email.