Readers like you help support this site. When you make a purchase using links on our site, we may earn an affiliate commission. All opinions remain our own.
 Windows 11 Installation Assistant on your Windows PC upgrades Windows 10 to Windows 11 or updates Windows 11 to the latest version, like 24H2, for a modern, AI-powered experience.
This free tool simplifies upgrades and updates with ease.
You can download the Windows 11 Installation Assistant for free on your Windows PC via Microsoft’s official site, requiring Windows 10 (version 2004 or higher) or any Windows 11 version, 9 GB free disk space, and the PC Health Check app.
Developed by Microsoft, it’s trusted by users to upgrade to or update Windows 11 version 24H2, the latest release with enhanced security and Copilot+ AI features.
If you’re a professional, student, or home user seeking a fresh or current Windows 11 setup, you need a tool that’s fast and reliable.
This guide covers downloading it on Windows, its key features, and tips to get started.
Share your Windows 11 upgrade story below, or contact us for help.
How to Download Windows 11 Installation Assistant on PC
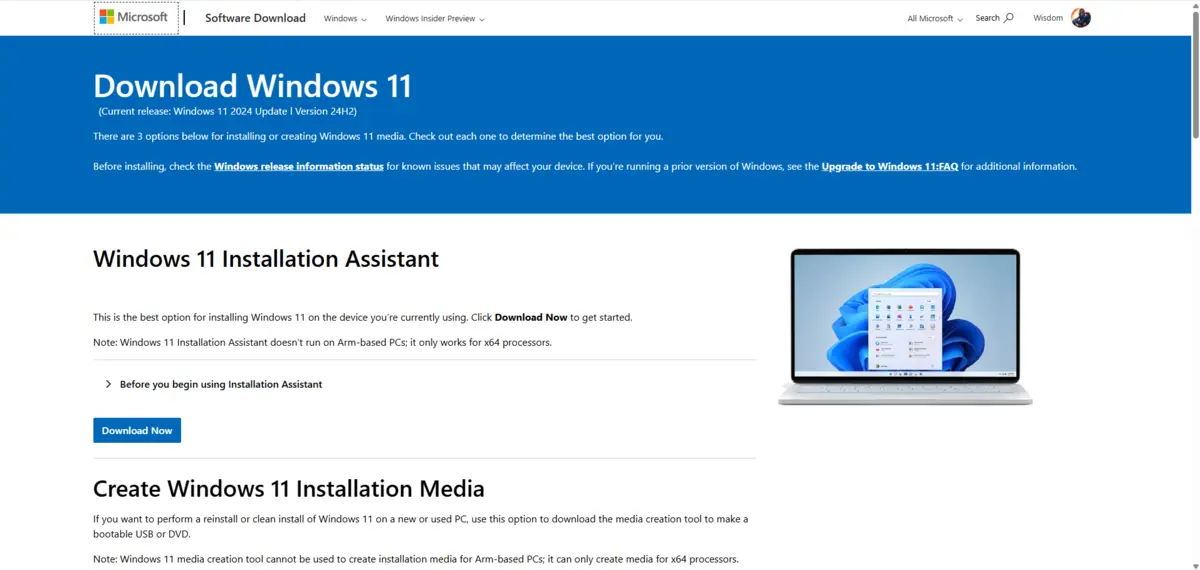
To get the Windows 11 Installation Assistant on your Windows PC, download it from Microsoft’s site. Here’s how:
- Microsoft Website
- Visit the page: Windows 11 Installation Assistant.
- Click Download Now under Windows 11 Installation Assistant (about 5 MB, named Windows11InstallationAssistant.exe).
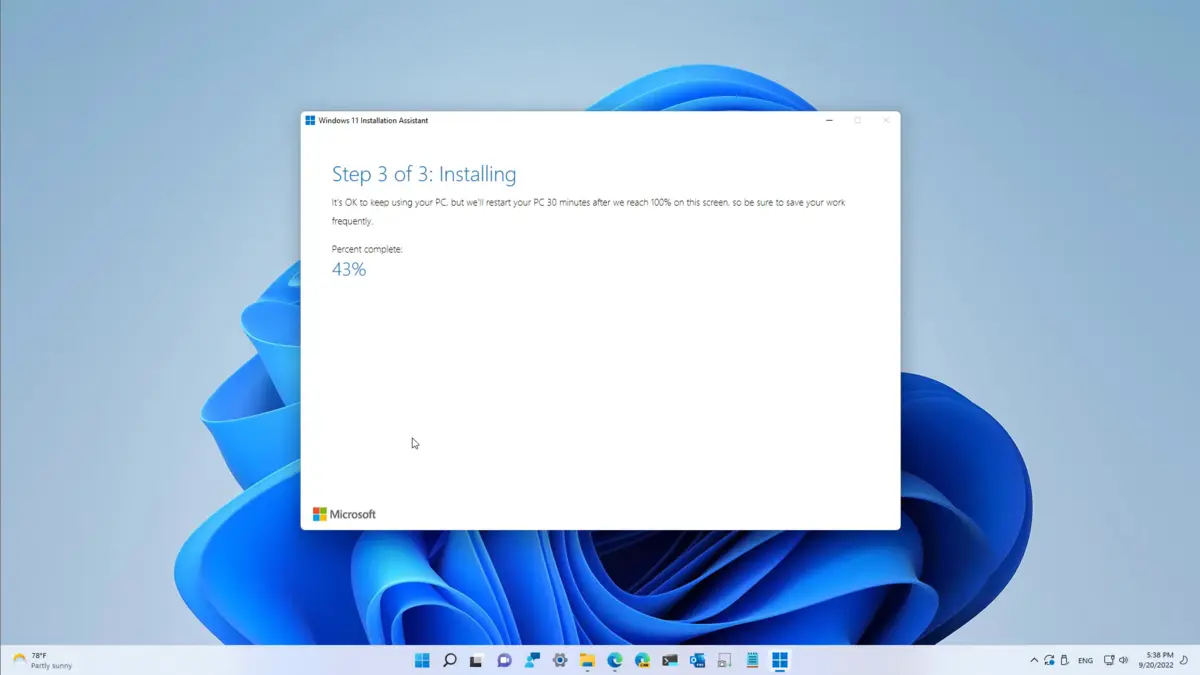
- Run the tool as an admin, click Accept and Install, and let it download 9 GB of files.
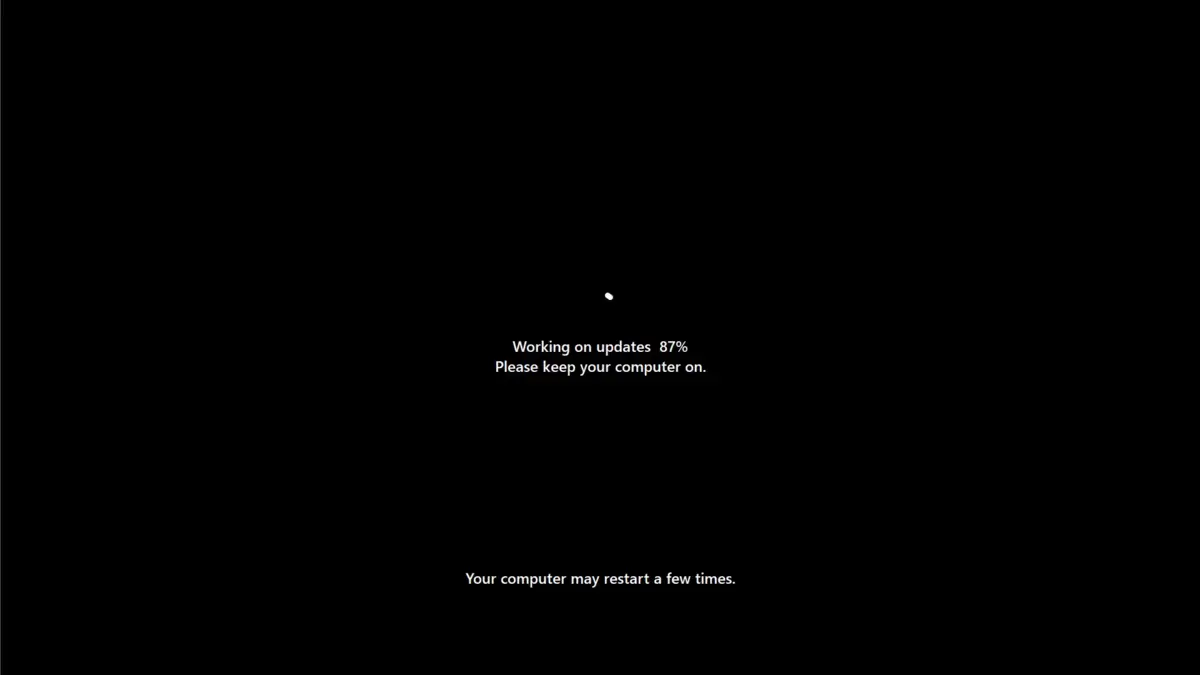
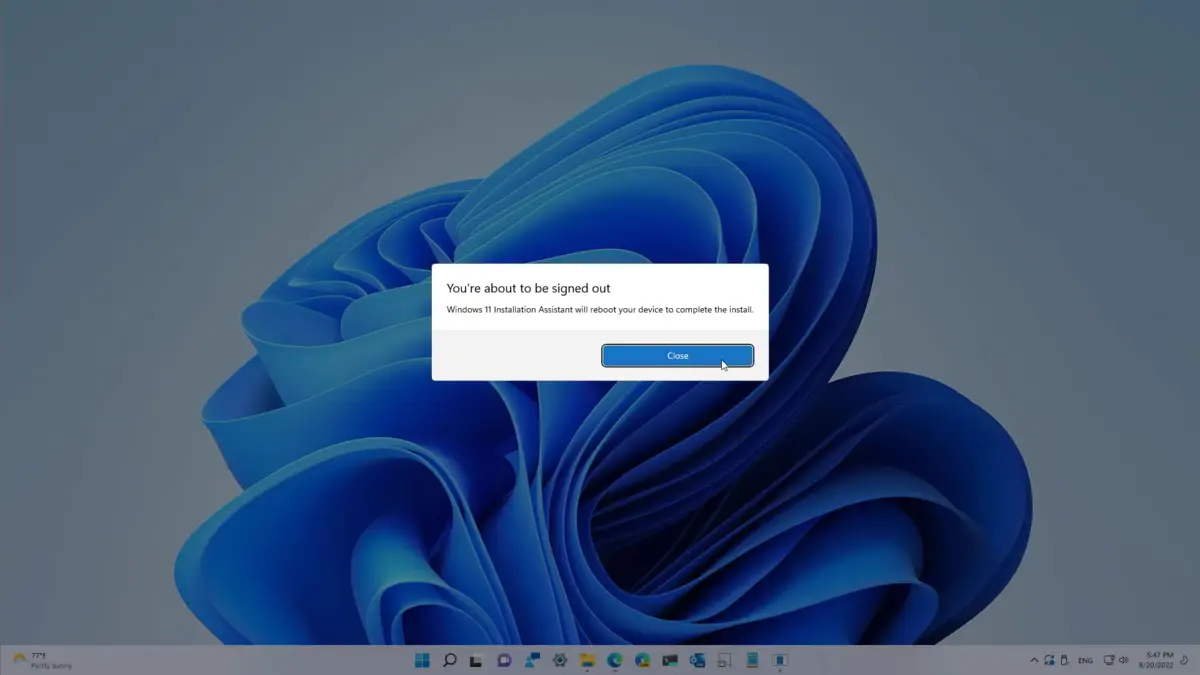
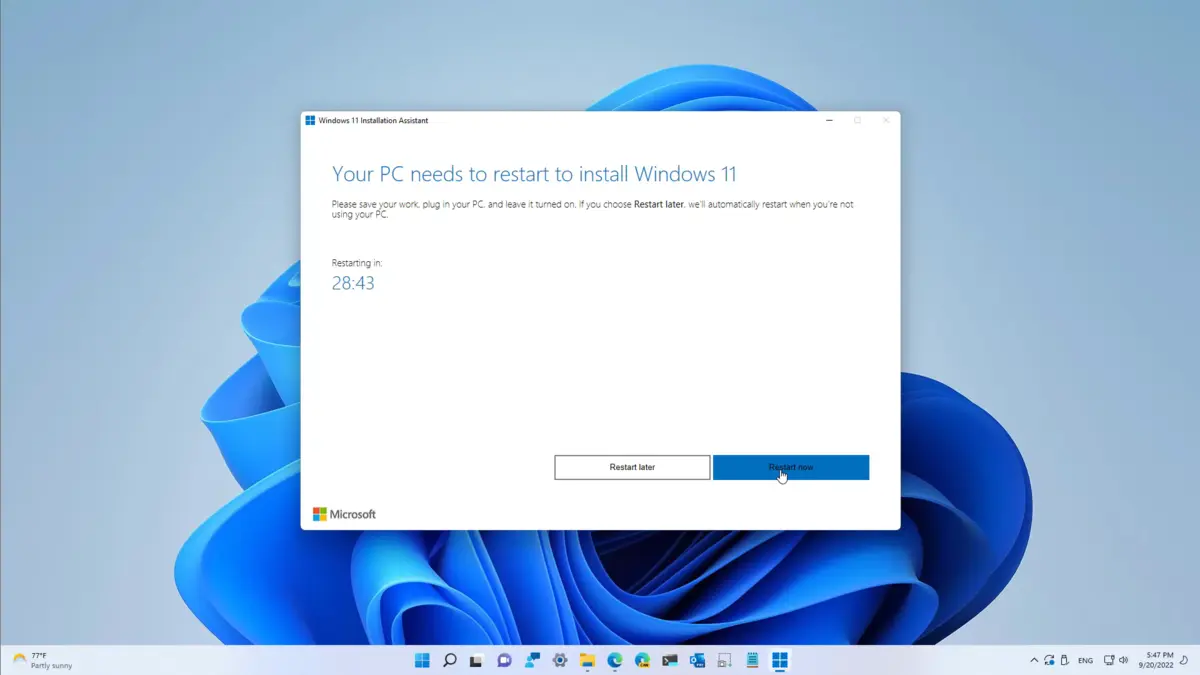
- Wait for installation; your PC will restart a few times. Don’t turn it off.
Quick Tip: 💡 Run the PC Health Check app first to confirm your PC meets Windows 11 requirements like TPM 2.0.

What is Windows 11 Installation Assistant About?
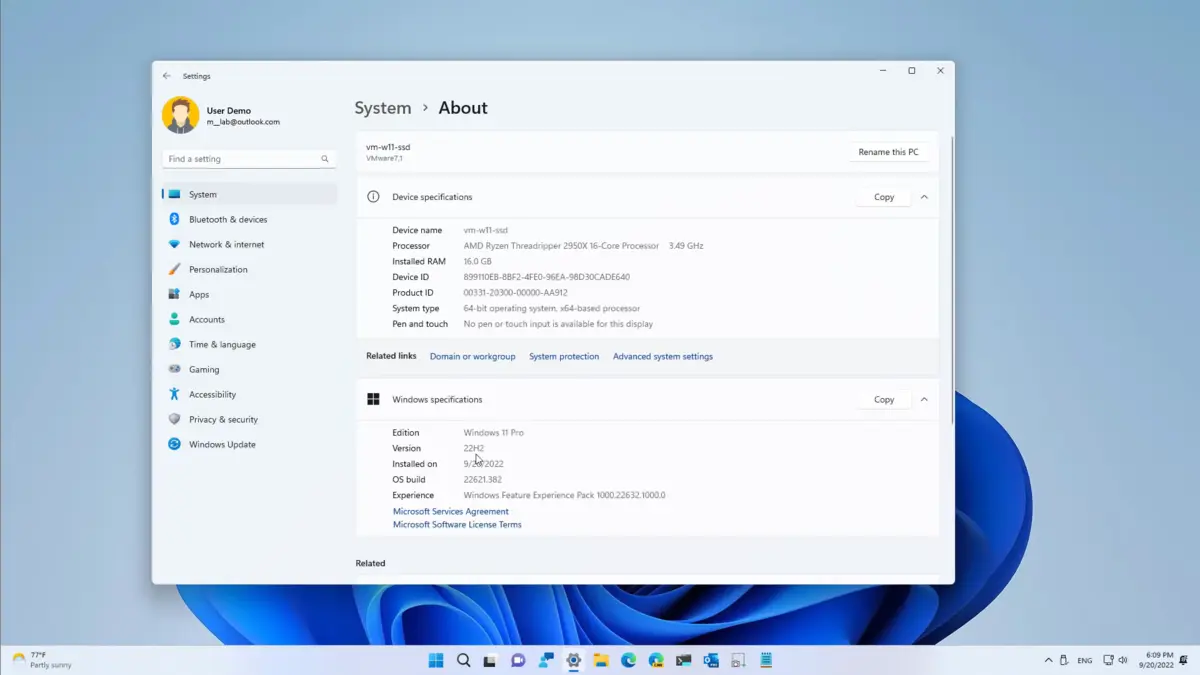
Windows 11 Installation Assistant, developed by Microsoft, is a free tool that upgrades Windows 10 (version 2004 or higher) to Windows 11 or updates Windows 11 to the latest version, currently 24H2 (October 2024).
It checks hardware compatibility (e.g., TPM 2.0, Secure Boot), downloads 9 GB of files, and installs the update while keeping your apps and files intact.
For Windows 11 users, it bypasses phased Windows Update rollouts to get 24H2’s modern interface, improved File Explorer, and AI features like Recall for Copilot+ PCs.
If regular updates aren’t working or keeping your Windows 11 system up to date, I personally recommend using the Windows 11 Installation Assistant to manually install the latest version.
And if you’re still on Windows 10 and your PC meets the system requirements, this tool can also upgrade you directly to Windows 11.
Looking for help with other Windows upgrade tools? See these guides:
- Windows 10 Update Assistant – For updating Windows 10 to the latest version.
- Windows 10 Installation Media – For creating bootable install drives for Windows 10.
- Windows 11 Installation Media Tool – For clean installs or upgrading offline (coming soon).
Core Features: Upgrade or update to Windows 11 with built-in compatibility checks.
Why Use Windows 11 Installation Assistant on Windows?
It’s quick, secure, and keeps your PC modern.
- Upgrades Windows 10 to Windows 11 24H2 or updates Windows 11 to 24H2
- Keeps apps, settings, and files intact
- Verifies TPM 2.0, Secure Boot, and 4 GB RAM
- Free and lightweight, only 5 MB to download
- Supports rollback to Windows 10 within 10 days
Popular Industries and Use Cases for Windows 11 Installation Assistant
Windows 11 Installation Assistant is used across industries and tasks, including:
- Industries: Business (secure workstations), Education (modern student PCs), Home (personal upgrades)
- Use Cases: Upgrading to Windows 11, updating to 24H2 for AI features, ensuring security post-2025, refreshing old PCs
Quick Start Guide for Windows 11 Installation Assistant
New to Windows 11 Installation Assistant? Get going quick:
- Download and run the tool as an admin.
- Click Accept and Install after compatibility checks.
- Wait for download and installation; let your PC restart.
Best Settings for Windows 11 Installation Assistant
Tweak these for a better experience:
- Disk Space: Free up 9 GB on C: drive before starting.
- Power: Plug in laptops to avoid battery issues.
- Backup: Save files to an external drive or OneDrive first.
Common Issues & Fixes for Windows 11 Installation Assistant
- Windows 11 Update Assistant stuck at 99%: Restart your PC by pressing the power button for 5-10 seconds and then press it on again after waiting 1 minute.
- Compatibility Errors: Run PC Health Check to confirm TPM 2.0 and Secure Boot; update BIOS if needed.
- Forced Reboots: Save work before starting, as restarts are automatic.
- Slow Download: Use a wired connection or pause background apps.
Windows 11 Installation Assistant Screenshots
Windows 11 Installation Assistant Beginner’s Video
Watch this quick guide to learn how to use Windows 11 Installation Assistant for your PC:
System Requirements for Windows 11 Installation Assistant
- OS: Windows 10 (version 2004 or higher) or Windows 11
- CPU: 1 GHz or faster, 2+ cores, 64-bit
- RAM: 4 GB minimum, 8 GB recommended
- Storage: 9 GB free on C: drive
- Other: TPM 2.0, Secure Boot, internet, admin account
Windows 11 Installation Assistant on Windows FAQ
- Is Windows 11 Installation Assistant free? Yes, it’s a free Microsoft tool.
- Can Windows 11 users use it? Yes, to update to the latest version (e.g., 24H2), bypassing phased Windows Update rollouts.
- Can I rollback to Windows 10? Yes, within 10 days, via Settings > System > Recovery.
Support and Community
Try the Microsoft PC Manager for more ways to tweak your PC.
Discover more from Windows Mode
Subscribe to get the latest posts sent to your email.